Creating a SoftNAS Virtual Machine
You can add the SoftNAS Virtual machine from within the Microsoft Azure Management Portal, and associate it to a virtual network.
Creating the SoftNAS Virtual Machine
To create the SoftNAS virtual machine
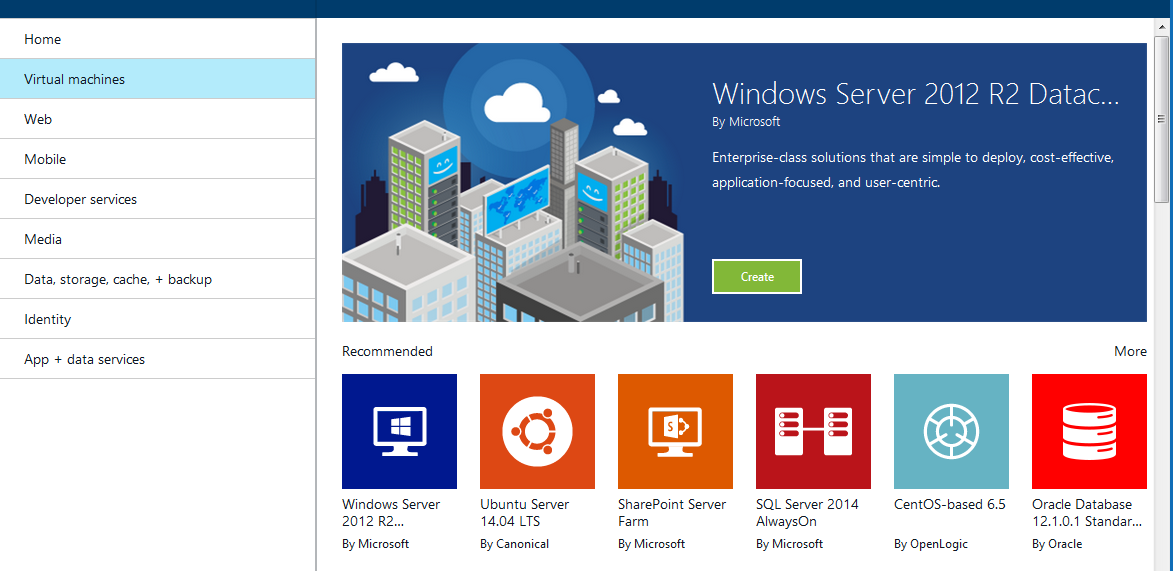
1. From the Azure Management Portal, click on Marketplace>Virtual machines. The Virtual machines screen is displayed.
2. Scroll down to Azure certified.
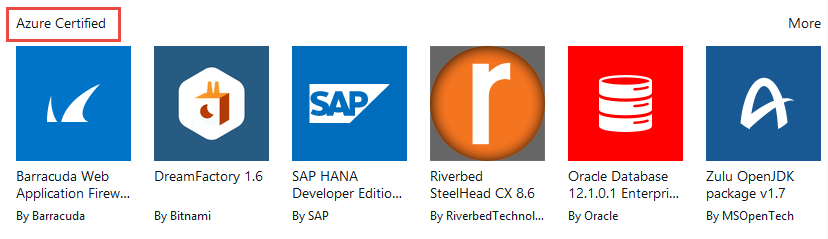
3. Click on More. A new panel is displayed, listing all available Azure certified VMs. Scroll down until you reach the SoftNAS Product Offerings.
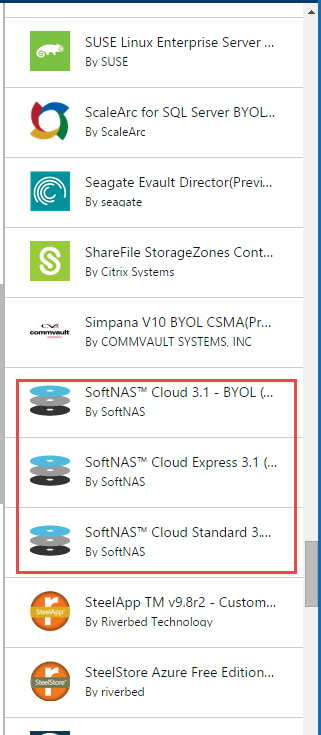
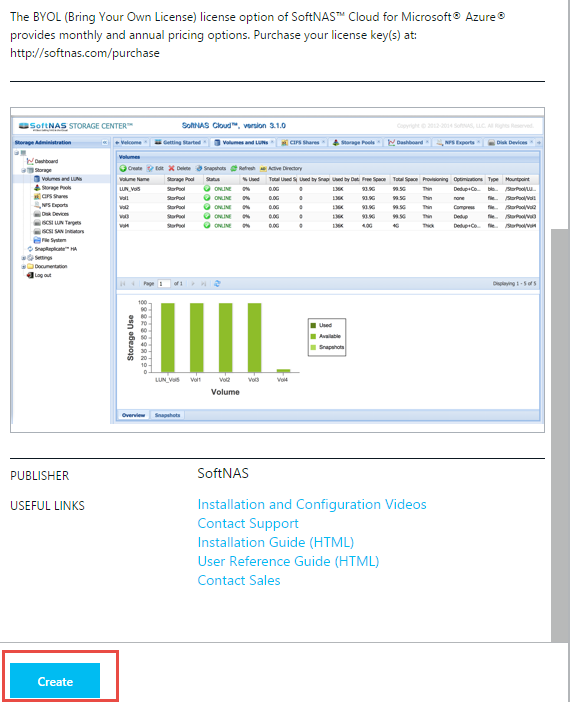
Choose the SoftNAS Product that is appropriate for your deployment scenario. For the purpose of this installation document SoftNAS Cloud 3.1-BYOL (Bring Your Own License) will be used.
4. Click on Create.
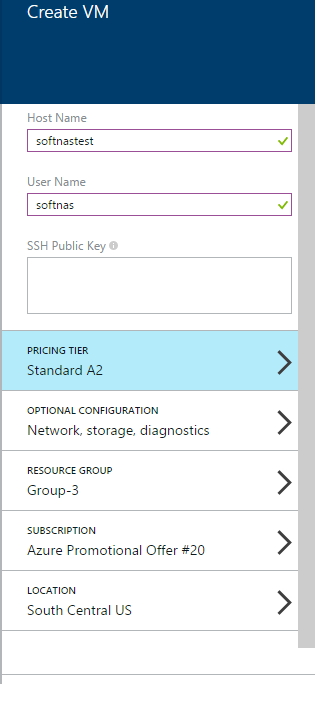
The Create VM Blade is displayed
The following components are required for a successful SoftNAS VM deployment
-
Configure hostname/username and authentication
-
Set Pricing Tier
-
Perform Network configuration
-
Purchase
Configuring Host Name/User Name and Authentication
Here the appropriate Host Name, User Name, and public SSH key will be set. The User Name is required to be "softnas". SSH will be used later to access the SoftNAS instance with a Linux login to set the password for User Name "softnas".
To make the required settings, configure the network settings as described in the table below.
|
Parameter
|
Description
|
|
Host Name
|
Provide a unique name for the Host.
|
|
User Name
|
Set to softnas. The User Name of softnas is required to login to the virtual machine.
Note: The password for the softnas account is not set through the Azure interface. SSH will be used to access the SoftNAS VM as a Linux login. The password will be created then.
|
|
SSH
|
Paste in the public key for an SHH key pair. For example, you can use ssh-keygen on Linux or OS X, or Putty on Windows. For more information, see section Generating SSH Keys.
|
Setting Price Tier
Windows Azure includes a variety of pricing tiers designed to group compute resources together in bundles. SoftNAS provides recommendations of 3 commonly used Tiers for best possible product experience. Other Tiers may be used based on user preference. Note that the A0 Tier can be used as a free offering.
To set the Tier
1. Click on pricing Tier. The Tiers screen is displayed.
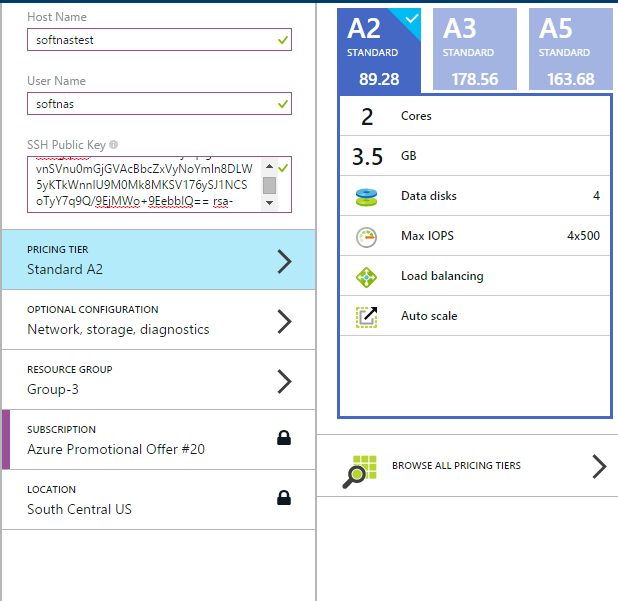
2. Use one of the suggested Tiers, or browse other pricing tiers to meet your needs.
Network Configuration
You can associate the SoftNAS VM to an existing virtual network or create a new virtual network specifically for the SoftNAS VM.
To specify the virtual network
1. From the Create VM Blade, click on Optional Configuration.
2. Under Optional config click on Network. The network settings are displayed.
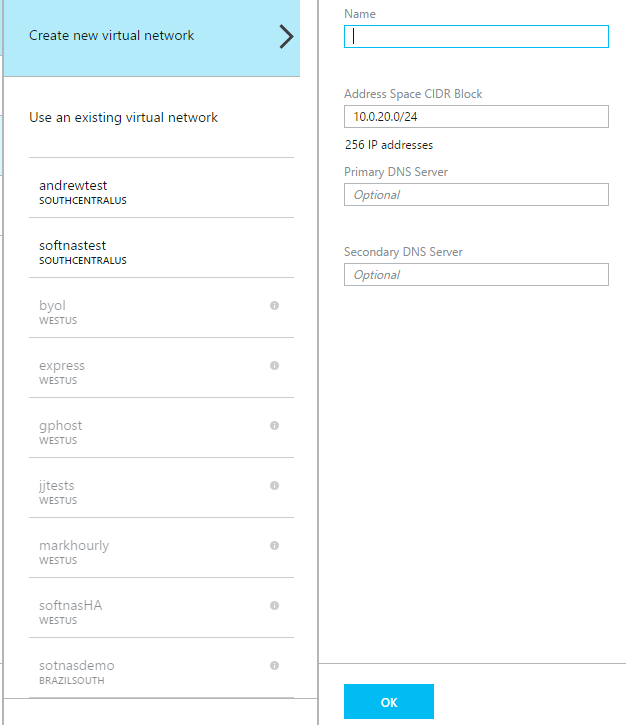
2. Associate the SoftNAS VM to an existing virtual network, or create a new virtual network.
Note: If creating a new network you can simply provide a name for the virtual network. It is feasible to use the default CIDR block and to use the default Windows Azure DNS server.
Purchase
Once you have performed the optional configuration, you can make purchase
To purchase
1. Launch the VM by clicking on "Create."
2. On the next screen review the purchase details and then click on Purchase.

Provided everything runs smoothly, you new SoftNAS instance is launched into Microsoft Azure.
Note: After launching the VM you still have to set the endpoints, as part of the next step.
For more information see the following sections