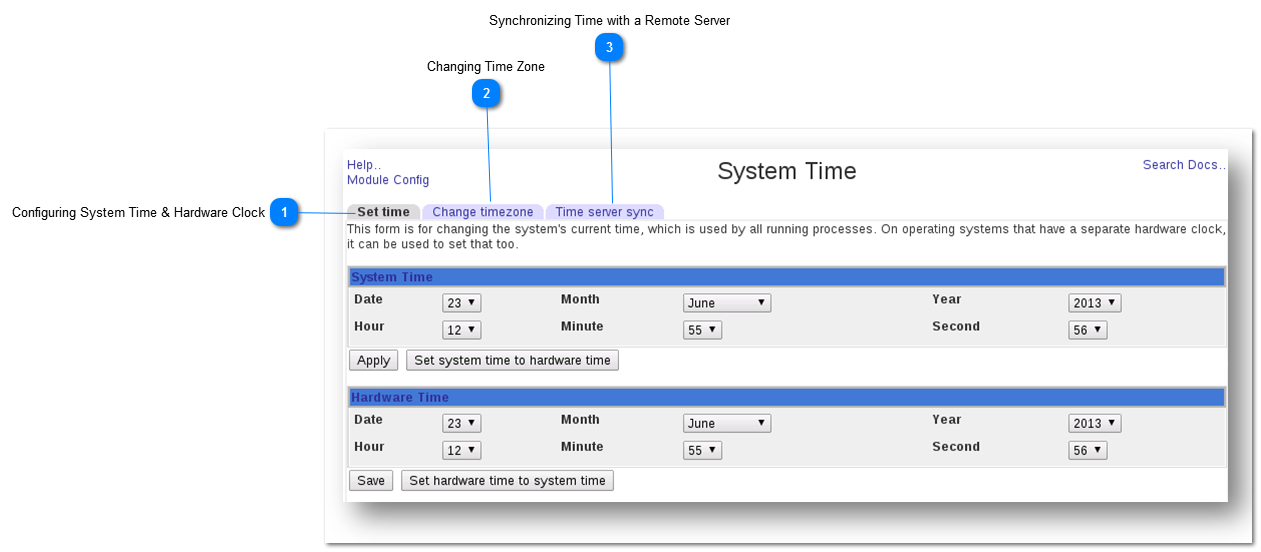
The System Time module provides configuration variables for system time and hardware clock; change time zone and synchronize the system time with a remote server.

 Configuring System Time & Hardware Clock
Set both the system time and hardware clock in this section.
1. Navigate to the System Time page.
2. Select the date from the Date drop down list.
3. Select the month from the Month drop down list.
4. Select the year from the Year drop down list.
5. Select the hour from the Hour drop down list.
6. Select the minute from the Minute drop down list.
7. Select the second from the Second drop down list.
8. Click the Apply button.
9. To set the same system time to the hardware clock also, click the Set System Time to Hardware Time button.
10. Similarly to set the hardware clock separately, select the required time from the drop down lists in the Hardware Time section.
11. Click the Save button.
12. Set the system time from the hardware clock. To do so, click the Hardware Time to System Time button.
The changes made to the system time and hardware clock will be saved.
|
|
 Changing Time Zone
This section provides the variables to set the system’s default time zone, which is used to convert the system time to a human-readable format and offset.
1. Click the Change Timezone tab.
The Time Zone page will be displayed.
2. Select the required timezone from the Change Timezone To drop down list.
3. Click the Save button.
The new timezone will be set.
|
|
 Synchronizing Time with a Remote Server
This section provides the variables to configure the system for automatic time synchronization with a remote server. Synchronization will be done using the Unix time protocol or NTP, depending on which commands are installed and what the remote system supports.
1. Click the Time Server Sync tab.
The Time Server Sync page will be displayed.
2. Enter the host names or address of the time server in the Time Server Hostnames or Addresses text entry box.
3. Choose whether to synchronize the time when Webmin starts or not by choosing Yes or No option.
4. Choose whether to synchronize the time on schedule. Choose the option as either No or Yes at times below.
5. If Yes, select the required time from the Minutes, Hours, Days, Months and Weekdays section.
6. Click the Sync and Apply button.
The system will be configured to automatically synchronize the time with a remote server.
|
|