Configuring the Network Using SoftNAS Console
SoftNAS appliances have a Console for vSphere and Hyper-V platforms.
It is very easy to use and simply follow the steps given below.
Note: In the following example, you can see the Console configuration from vSphere.
1. Log into vSphere Client.
2. On the Home Page, double click the Host and Clusters option under the Inventory section.
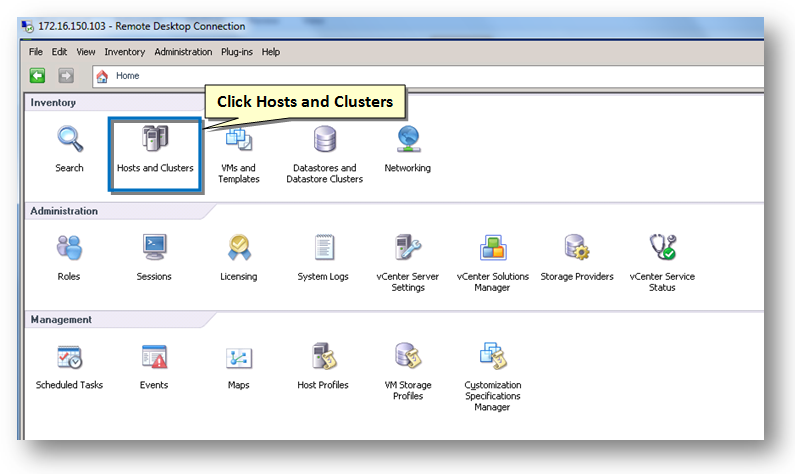
All Hosts and Clusters will be displayed.
3. Right click on the SoftNAS VM and select Open Console option.
or
Navigate to Console tab in the right section.
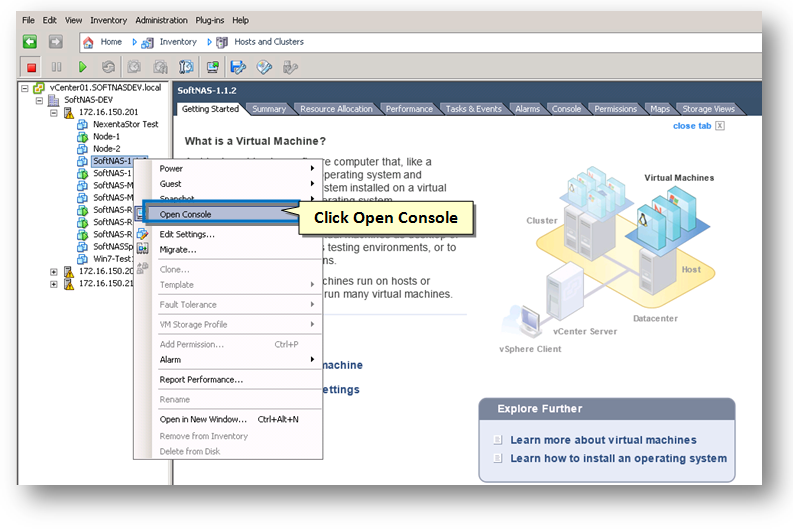
The console of the selected VM will be displayed.
Note: Check the status of VM on the console. If it is off, you need to power it on.
4. Right click on the SoftNAS VM and select the Power On option.
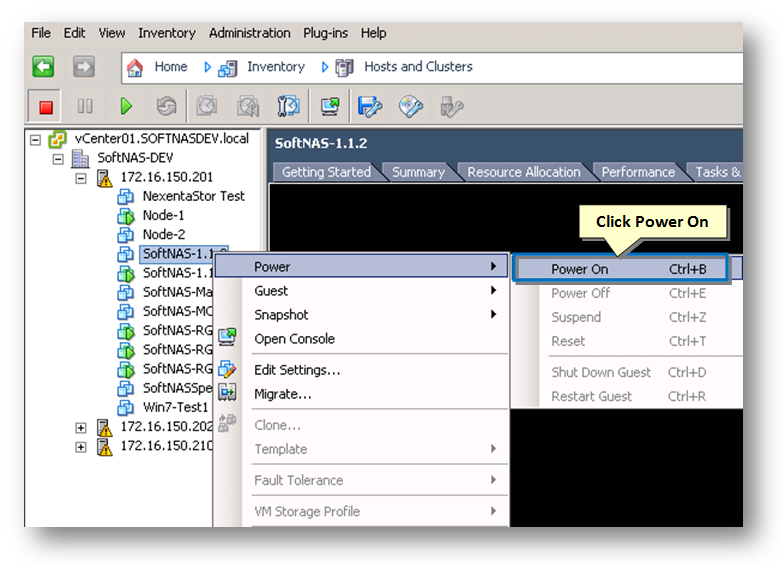
The Console with the new configuration screen will be displayed.

The Console has 3 options.
-
Customize System -
A. To Customize the system, press the F2 function key on the keyboard.
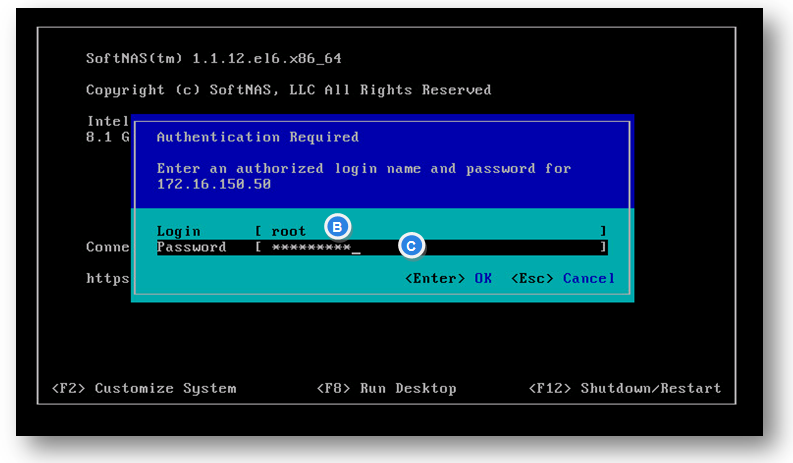
You need to enter an authorized login name and password for the logged in VM.
B. Use the login id as root in the Login text entry box.
C. Enter the root password as Pass4W0rd in the Password text entry box (you can also change the root password using the console).
D. Press the Enter key on the keyboard to log in.
The System Customization screen will be displayed.
For more information refer to the following link.
Customizing the System
-
Run Desktop - To run the desktop, press the F8 function key on the keyboard.
-
Shutdown/Restart - To shutdown or restart the system, press the F12 key on the keyboard.