Configuring a New SoftNAS Instance on EC2
Creating a new SoftNAS instance on EC2 is very easy.
The following steps summarize what is required to get up and running with a new SoftNAS instance.
-
Creating a New Instance
-
Choosing an AMI
-
Providing Instance Details
-
Creating a Key Pair
-
Configuring Firewall
-
Reviewing Details
Creating a New Instance
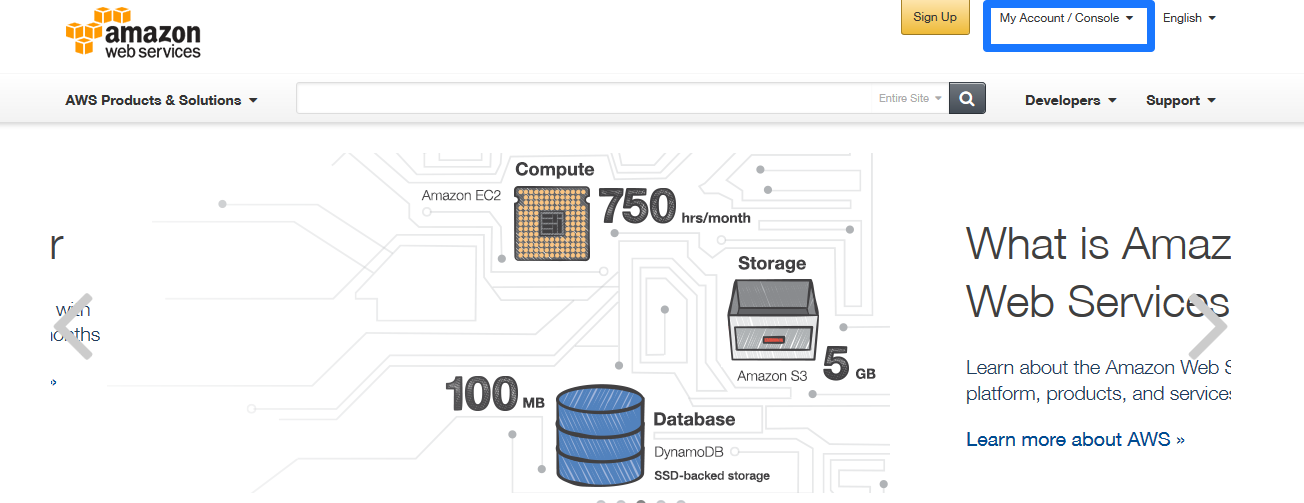
1. Access Amazon Web Services from your browser. Click the Sign Up button or choose AWS Management Console option in the My Account / Console menu in the top right corner of the screen.
The Amazon Web Services Console will be displayed.
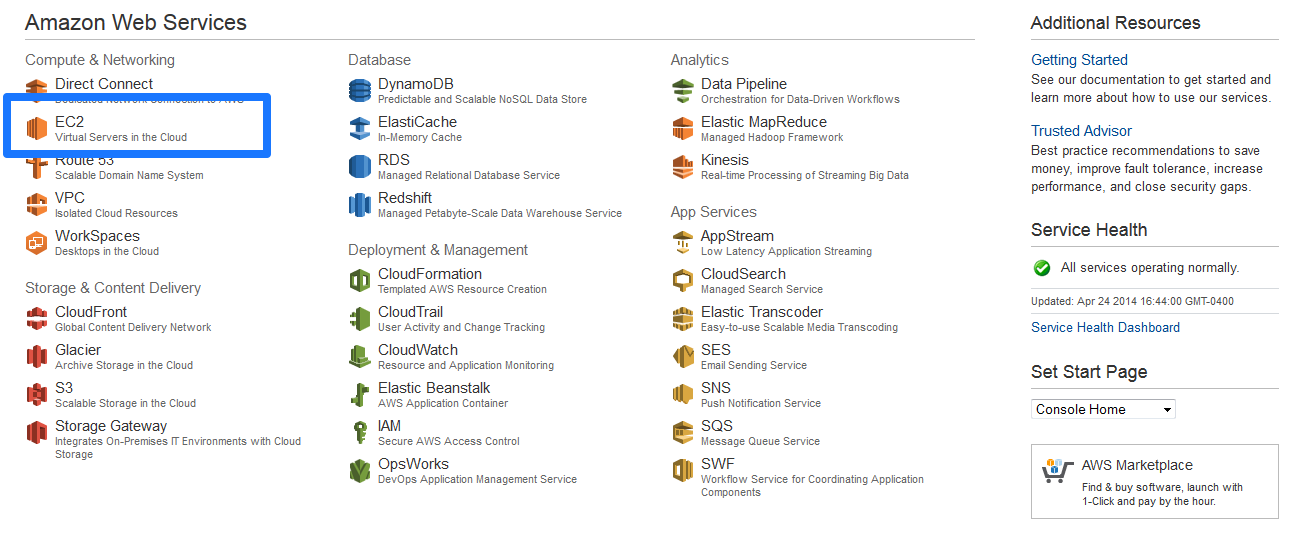
2. Click the EC2 option on the console to create a SoftNAS virtual server in the cloud.
The Amazon EC2 Console Dashboard will be displayed.
-
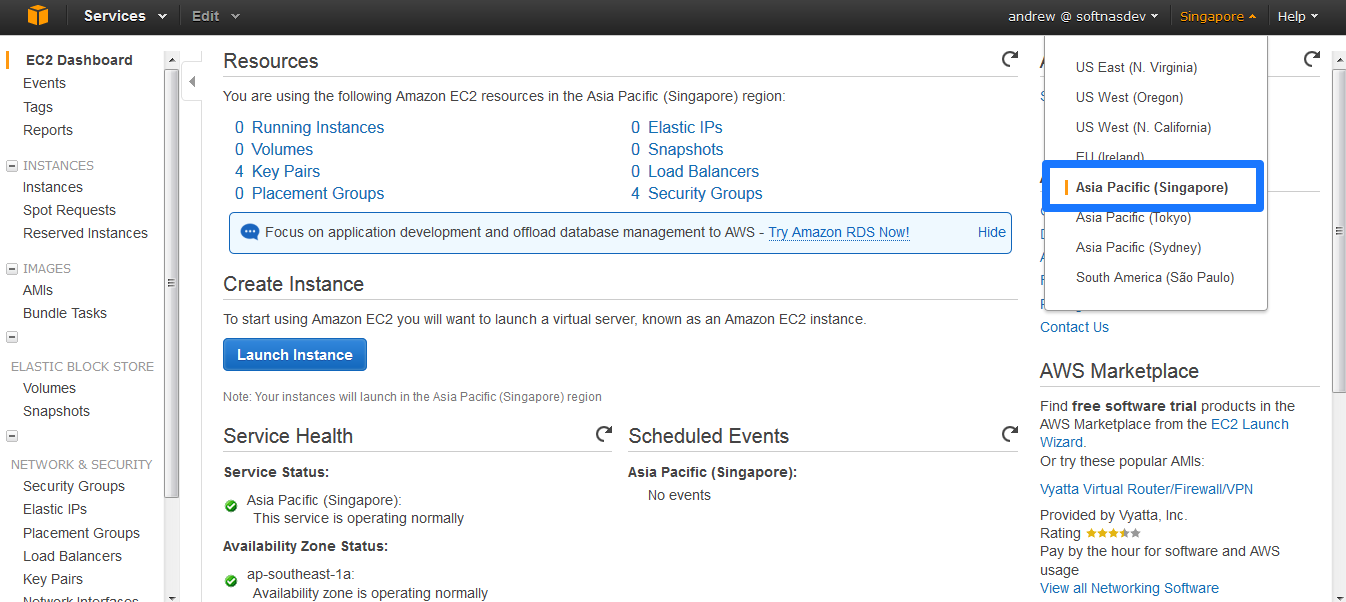
3. Select the location / region for SoftNAS AMI on EC2 from the top right drop down list. In the above example, the Asia Pacific (Singapore) AMI is selected.
4. Click on the Launch Instance button, to start the New Instance Wizard
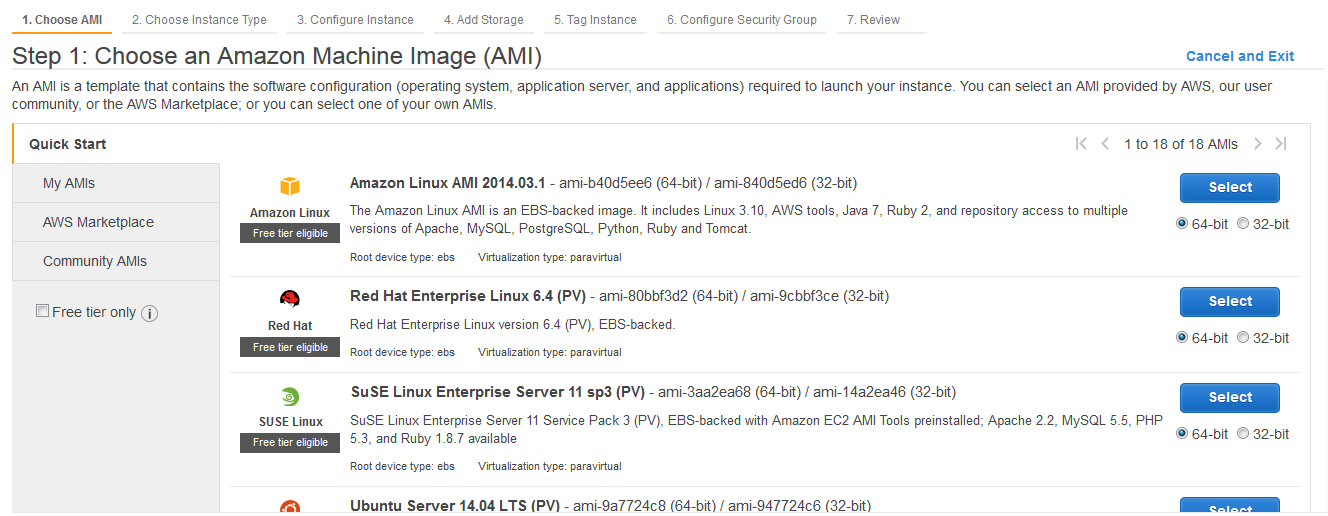
Choose AMI
SoftNAS provides several different product offerings, but installation is basically the same.
-
SoftNAS Cloud Express
-
SoftNAS Cloud Enterprise
-
SoftNAS Cloud Enterprise
For SoftNAS Cloud you can navigate to AWS Marketplace or Community AMIs.
Under AWS Marketplace search for SoftNAS.
Note: The actual "Manifest" value will vary with different releases of SoftNAS.
Note: SoftNAS supports two different virtualization types, either paravirtual (PV) or hardware virtual machine (HVM). You can pick the one that is most suitable to your deployment.
2. Click on Select. You are taken to step 2 of the wizard, where you can choose an instance type.
Choosing an Instance Type
On the Choose Instance Type screen you can choose the instance type that will best match the needs of the application.
Note: M3.medium is recommended as the minimum instance size to deploy advanced storage features such as SnapReplicate™ and SNAP HA.™
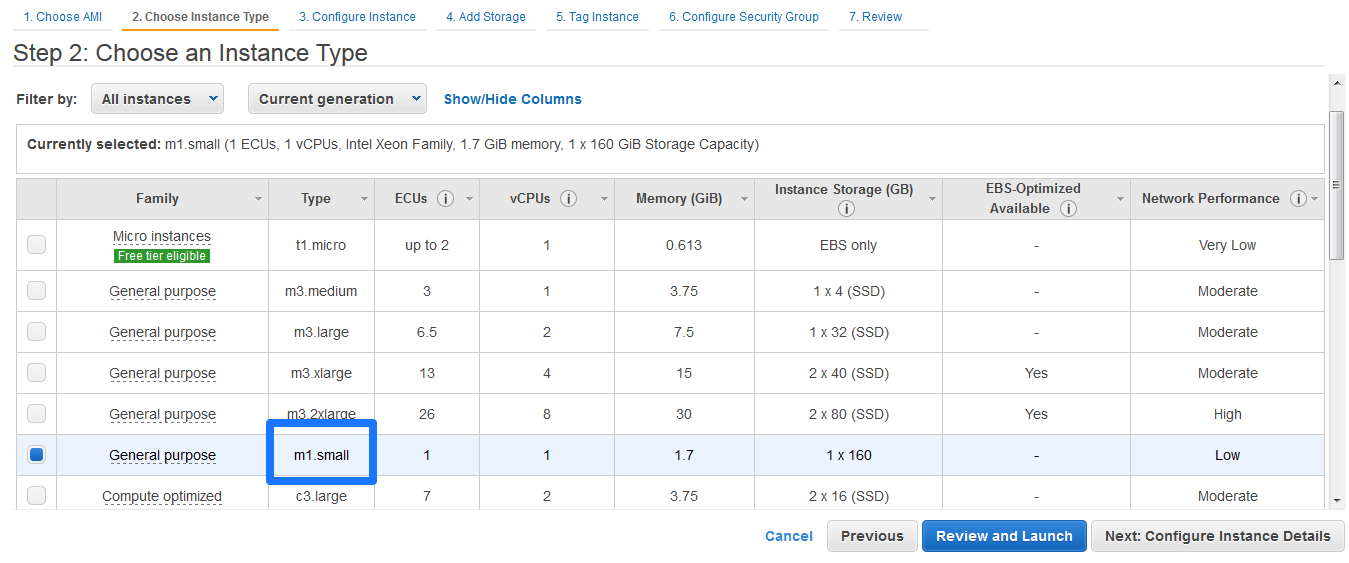
To select an instance type
1. Select at least a small instance type for SoftNAS.
2. Click Next to Configure Instance Details.
Providing Instance Details
The Configure Instance screen enables you to specify instance details such as the network into which you want to launch your new instance.
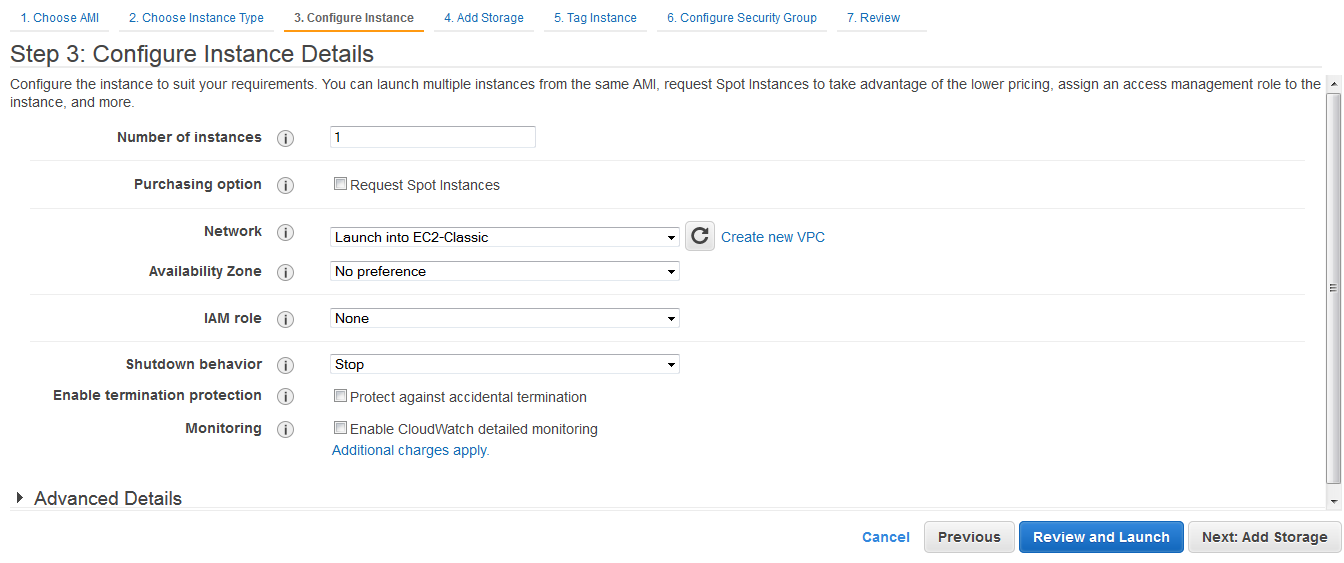
To configure the instance details
1. Enter the number of instances as 1 in the Number of Instances text entry box.
2. For network you can either choose to launch into EC2-Classic or into a created VPC.
VPC Notes: The Launch into option defaults to EC2; however, you can also launch an instance into your own Amazon VPC (Virtual Private Cloud) environment instead. VPC's can be useful if all of your computing will be done in the EC2 environment, or if you want to interconnect an existing network via a VPN gateway to the VPC environment; e.g., setting up an IPSec tunnel between an existing data center and the VPC. If you choose to operate SoftNAS within the private subnet of a VPC, please note that you must create an outbound NAT route that enables the SoftNAS instance to access the Internet to perform software updates, activation, etc. In this case, only outbound TCP traffic to the softnas.com domain is required to be enabled; i.e., inbound access to ports 22, 80 and 443 for administration can be restricted to VPC subnet access only.
Note: You can also use a VPC if you will be planning to use SoftNAS in high availability mode (SNAP HA™). For more information, see the document "SoftNAS High Availability Guide."
3. The AWS Identity and Access Management (IAM) role helps you to associate with the instance. It is recommended to create a SoftNAS IAM Role for secure management of Amazon S3 and EBS Disks. For more information, see section Creating the SoftNAS S3/EBS IAM Role for AWS.
4. Select the type of shutdown behavior from the Shutdown behavior drop down list. This option allows you to select whether the instance should stop or terminate when shut down.
5. Check the box Prevention against accidental termination option in the Termination Protection field. This prevents accidental termination of the SoftNAS instance. When an instance is terminated, it is permanently deleted, so this additional termination protected is highly recommended.
6. Enable or Disable Monitoring.
CloudWatch provides a detailed monitoring of the SoftNAS instance. The Free Tier includes basic monitoring metrics at 5-minute intervals, 10 monitoring metrics, 10 alarms and 1 million API requests at no additional charge. Check the box in the Monitoring field to enable CloudWatch, which is recommended.
Advanced Details:
You can configure the Advanced Details as part of configuring the instance.
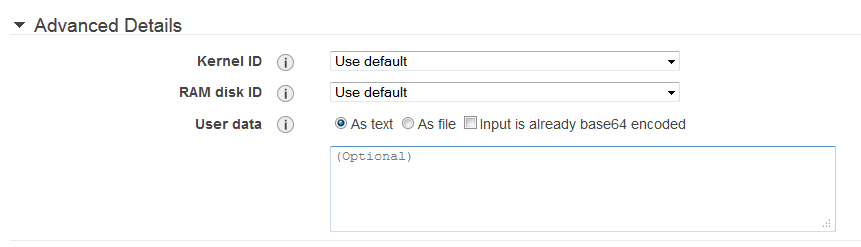
1. Accept the default value for the kernel for the Kernel ID.
2. Accept the default id from the RAM Disk ID.
After configuring the advanced details, you can click on Next to add storage.
Add Storage
You can setup multiple Volumes for SoftNAS use from the Add Storage screen.
By default, you will see the SoftNAS 30 GB device, as shown in the example. The root device is an EBS volume used to boot and run SoftNAS.
At this point, you may simply choose to continue without configuring any additional storage and add storage disks later (recommended if you are creating a production instance).
Or you can setup additional volumes straight away. These EBS volumes will serve as raw disk storage for SoftNAS, and can later be configured as RAID groups within SoftNAS.
Encryption
You can enable EBS Encryption when you add an EBS volume to your instance via the wizard.
Data on the volume, disk I/O, and snapshots created from the volume are then all encrypted. The encryption occurs on the servers that host the EC2 instances, providing encryption of data as it moves between EC2 instances and EBS storage. EBS encryption is based on the industry standard AES-256 cryptographic algorithm.
In the screenshot below, encryption has been selected.
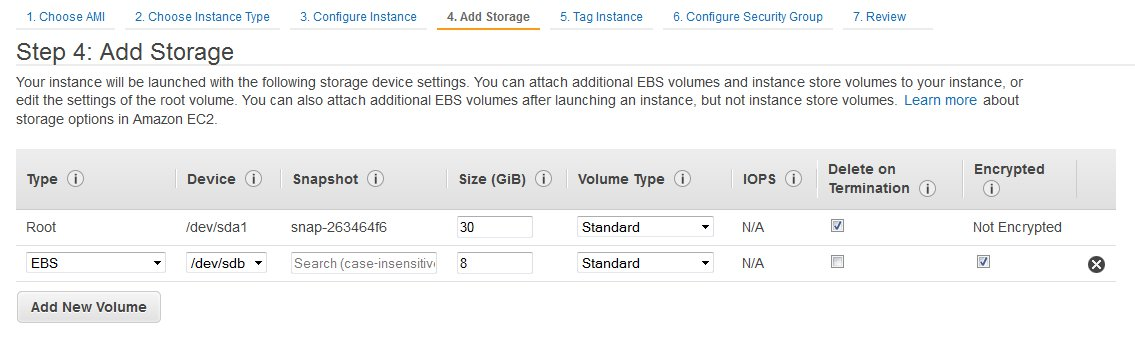
To add additional storage now
1. Click on Add New Volume.
2. Enter the size of the EBS volume in the Volume Size text entry box.
3. Select the type of volume from the Volume Type drop down list. The available options are Standards and Provisioned IOPS (io1).
-
Standard: Default IOPS (no guaranteed IOPS level in shared environment - less predictable, less consistent performance)
-
Provisioned IOPS: assign a specific level of IOPS by entering the number of I/O per second you want assured for the EBS data volumes (see Choosing an Instance Type)
4. Make sure to uncheck the box in the Delete on Termination field.
Note: This is very important because in the event the SoftNAS instance is terminated for any reason, even the EBS data volumes will be deleted. To avoid the possibility of data loss, it is better to uncheck this field.
5. Enable EBS Encryption if required.
Note: the device will default to /dev/sdf. For second and subsequent devices, you must manually enter the next sequential device ID; e.g., /dev/sdg, /dev/sdh, etc. Use device names of the format /dev/sdf[1-15] to /dev/sdp[1-5] instead; e.g., /dev/sdf1, /dev/sdf10, /dev/sdp15. This naming approach provides access to the most EBS volume disk devices. Do not mix the base name devices (e.g., /dev/sdg) with the numeric device names (/dev/sdg12). If you use a base device name, it will prevent use of the numeric device names, so use of the base names is no longer recommended.
Continue attaching the EBS volumes. The EBS Volumes will be attached to an EC2 instance to provide persistent data storage.
For example, if you wanted 1 TB of usable storage with RAID redundancy for increased performance and data redundancy, you could configure:
-
Two 1 TB EBS volumes, configured as RAID 1 mirrors
-
Five 250 GB EBS volumes, configured as RAID 5 (four data, single parity)
-
Seven 250 GB EBS volumes, configured as RAID 6 with a spare (four data, dual parity, one spare)
Tag Instance
You can add tags to your instance, in order to facilitate organizing, searching and browsing your resources.
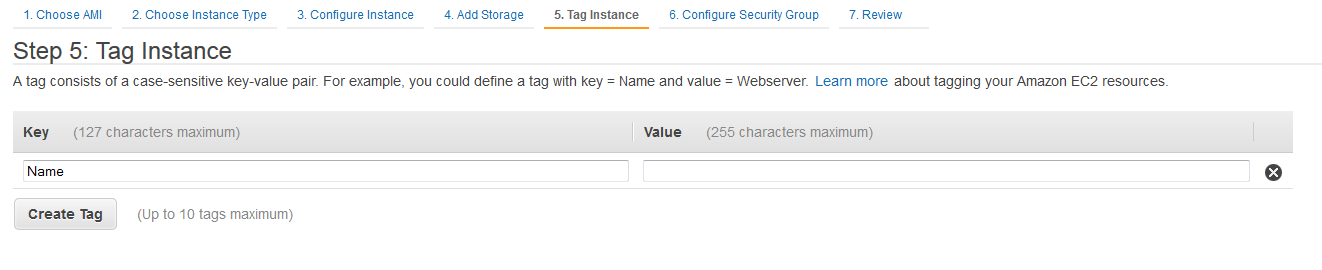
To enter tags
1. Enter the name of the tag in the Key field.
2. Enter the value for the tag in the Value field.
You can add more tags by clicking on Create Tag.
Configure Security Groups
You can configure Security Groups to lockdown traffic to your instances.
Security groups contain rules which determine which types of inbound traffic (TCP, UDP, ICMP) and ports are allowed. A Security Group is then assigned to an instance(s) to manage the inbound traffic flow.
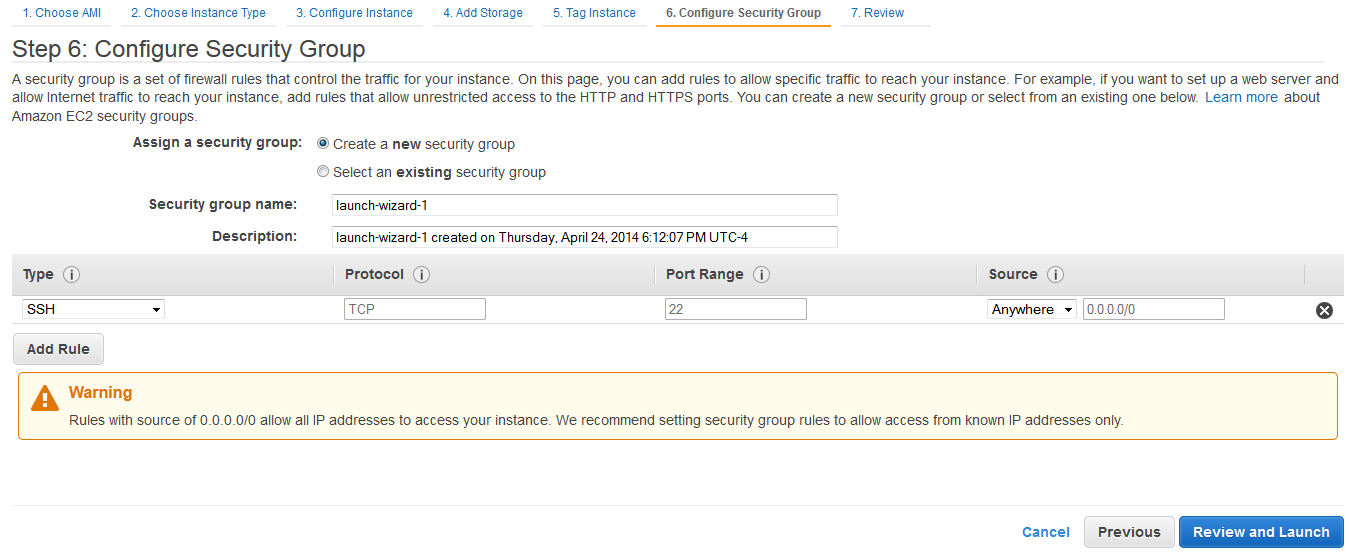
To configure the security groups
1. Enter the name of the security group in the Group Name text entry box.
2. Enter the description for the security group in the Group Description text entry box.
3. Click on Add Rule.
4. Select Custom TCP Rule from the Type drop down list. Configure Port Range and Source.
Similarly, create rules for ICMP, SSH, HTTPS and HTTP.
Security Group Best Practices
Consider the following Security Group configuration:
The following ports are opened for inbound traffic:
-
22: SSH allows incoming secure shell connections (required to administer SoftNAS / EC2 instance running Linux)
-
80: HTTP allows incoming web traffic
-
443: HTTPS is required to administer SoftNAS
Additional ports will need to be opened for NFS, CIFS, iSCSI, etc. as appropriate. An ICMP "reply" rule can also be added to allow ping responses.
Note The Source is configured to 0.0.0.0/0 (not recommended), which means allow access from any IP address on the Internet. In practice, it would be preferred to limit the range of IP addresses to only those absolutely required to have SoftNAS access. For example, SSH access should be limited to only those source IP addresses required to administer the system over the Internet, as you don't typically want just anyone being able to connect to SoftNAS.
After you have finished adding security groups, you can click on Review and Launch.
Reviewing Details
In the Review step, you can review all the information related to the instance before launching it.
Once you have reviewed all the information, click the Launch button.
Creating a Key Pair
The Create Key Pair section of the wizard will be displayed. In this step, you will create a public/private key pair used with SSH to access and administer your SoftNAS instance in the cloud.
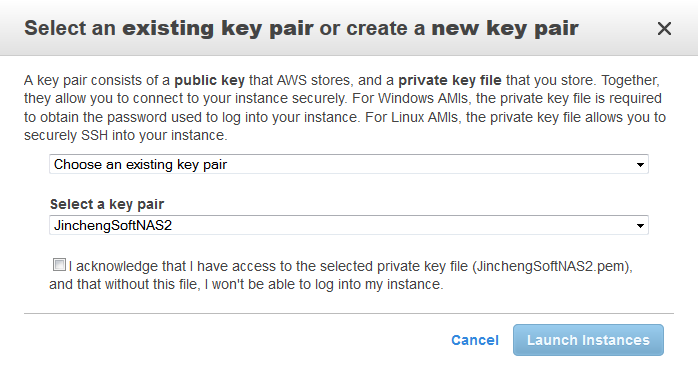
The Key Pair helps you to securely connect to your instance when it is launched. You can either choose from existing key pairs that you have created in the current region or create a new key pair. In the example, the option, Choose from your existing Key Pairs is selected.
Note: You should not select the Proceed without a Key Pair option. If you launch an instance without a key pair, you will not be able to connect to it. This option is used only when you are creating your own AMI and don't need to connect to the instance.
34. Click on Launch Instances.
For more information, refer to the following sections.