Getting Started Checklist
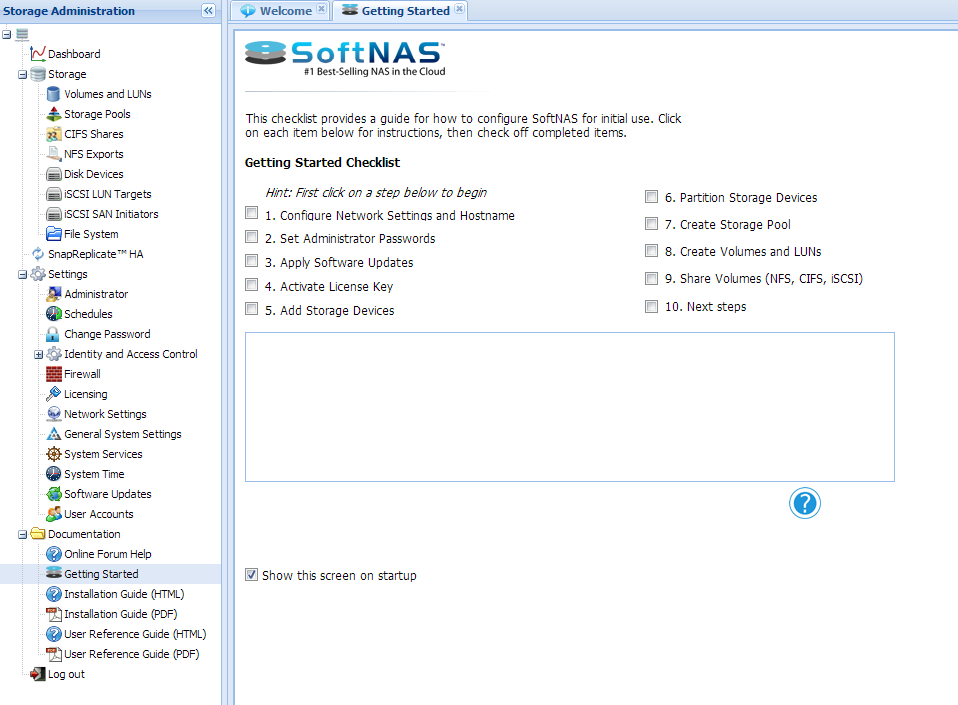
When SoftNAS StorageCenter is first started, the Getting Started Checklist will be displayed. This helper provides a set of step-by-step, on-screen instructions designed to make initial configuration, setup and use of SoftNAS Cloud® faster and easier for first-time users.
Access this option from the SoftNAS Cloud® Documentation section. Simply follow the steps given below.
1. Log on to SoftNAS StorageCenter. Be sure to enter your password correctly, as 5 unsuccessful attempts will prompt ReCaptcha to protect your account.
2. In the Left Navigation Pane, select the Getting Started option under the Documentation section.
The Getting Started panel will be displayed.

The Getting Started Checklist has various introductory steps for initial configuration needs.
3. Click the step to be configured.
Note: It is best to follow the same order of steps as mentioned in the checklist.
4. Refer and follow the instructions specified in the Instruction Box for completing the selected step.
5. Click Help  for more information and detailed instructions on how to configure the item in the selected step.
6. Click Configure Now to launch the configuration settings window for the step.
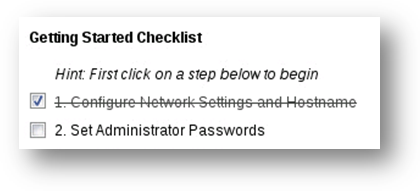
7. When the configuration task for the selected step is completed, click the checkbox in front of that step.
The step will be marked off the list to show that it is completed.

8. Repeat the above procedure for all tasks of each configuration step.
9. When all the initial configuration steps are completed, un-check the box in the Show this screen on startup field below the configuration area. This setting may also be accessed via SoftNAS StorageCenter > Administrator > Other Settings > Show/Hide
10. Set the Notification/Administrator Email. To set your administrator email, follow the instructions found in Changing Monitoring Notification Frequency.
IMPORTANT: An administrator email must be set in order to monitor the health of SoftNAS instances/virtual machines. Critical alerts will be sent to this email address, such as:
-
Disk Full
-
Resource Overload
-
other significant errors and issues
11. Remember to click Save settings to commit revisions.
12. Close the Getting Started panel.