Adding Domain Controllers as DNS Server for SoftNAS
In order to integrate AD with the SoftNAS Linux operating system, the first step is enabling the SoftNAS Linux system to resolve host names into IP addresses for the Active Directory controller, DNS server(s) and the SoftNAS Linux system itself (so you can use host names instead of IP addresses in the following steps).
You need to verify that your hostname and DNS are set up correctly:
1. In the Storage Administration Pane on the left, navigate to General System Settings -> Networking > Network Configuration > Hostname and DNS client and Host Addresses.
2. The DNS for SoftNAS, when integrated within an Active Directory environment, should be the domain controllers (like any other member server in the domain).
Begin by configuring your Hostname and DNS Client lookup for the SoftNAS server. Note that the Hosts file is configured to be used first for name resolution. In our examples, we use a domain name "SOFTNAS.local" and our domain controller and DNS is 172.16.150.1 on the local data center network. Our example host name is "SoftNASTEST".
3. Upon clicking Save to set the selected configuration, you will be returned to Network Configuration. Click Host Addresses.
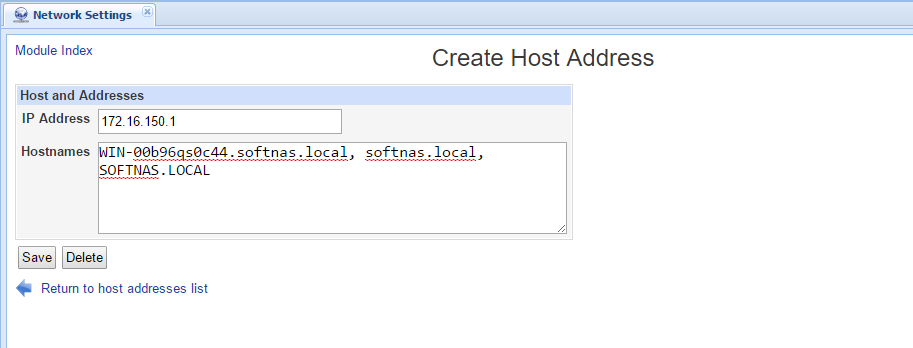
4. To create each host table entry, click on the Add a new host address link.
5. Fill in the form that appears, then press
Create.

6. Repeat for both the Active Directory and SoftNAS host entries so your final host table looks similar to this:
In the above example, the IP address of the Active Directory controller is 172.16.150.1, so its FQDN is entered (WIN-00B96QSOC44).SOFTNAS.local, along with the "realm" name "SOFTNAS.LOCAL" in lower-case, upper-case and just the domain name "SOFTNAS". The next entry maps the IP address of the SoftNAS Linux host's IP address 172.16.150.50 to FQDN "softnastest.softnasdev.local", "softnastest" and "SOFTNASTEST".
7. Restart the network system to ensure the new DNS resolution rules are in effect.
Note: Anytime you change the DNS or network settings, be sure to either issue a service network restart command as the root user or reboot SoftNAS with a sync; sync; reboot sequence to restart the network subsystem so the new settings will take effect.
8. Verify the host mappings work correctly from a command line (on the SoftNAS host via SSH or a console).
You may also want to verify that your host entries are correct by pinging them with "ping" commands that confirm each mapping is correct. If these host name lookups are incorrect, other steps which follow will fail. Take a moment to verify the host mappings are working as expected for best results.
If you prefer to do this verification via the StorageCenter UI, you can use the following screen to do so. To reach the Command Shell screen, choose Settings > General System Settings, which will open a new window with access to the full Webmin console, then choose Others > Command Shell.
Be sure to specify the "count" of pings using the "-c 4" switch (or the command will run indefinitely and not return).