The Snapshots tab contains the Volume Snapshot Control Panel.
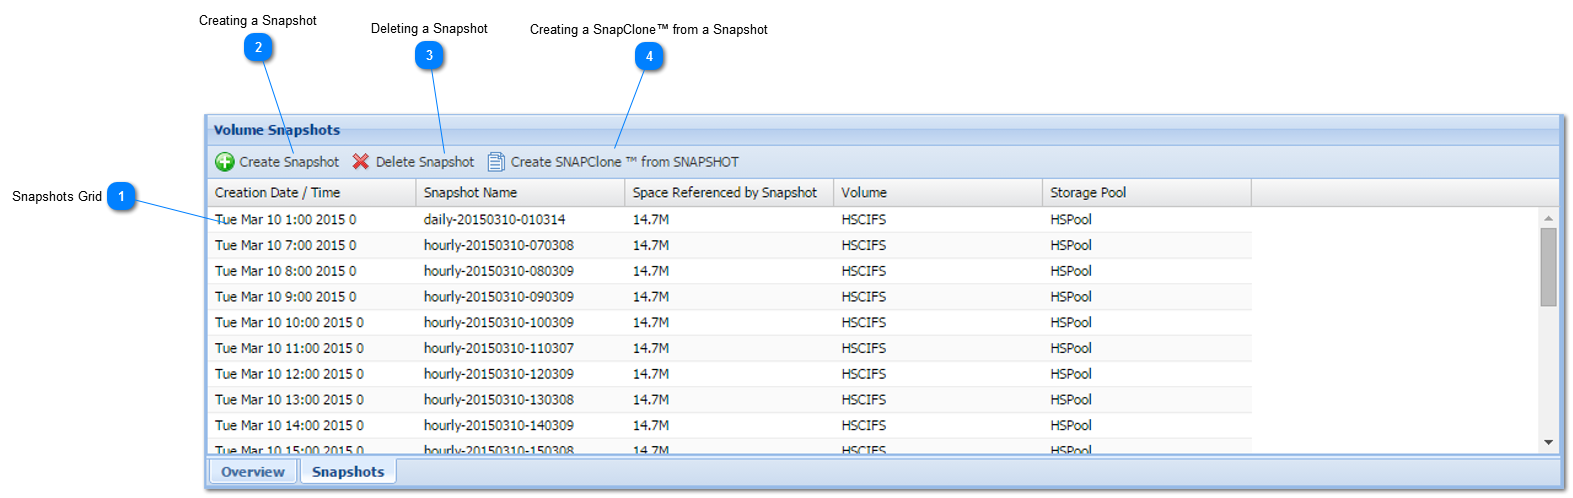
 Snapshots Grid
The Snapshots grid shows a list of snapshots for the currently selected volume (in the upper grid on the page). If no single volume is selected, then snapshots for all volumes are shown (default until a volume is selected). The Snapshots table has the following fields.
|
Field
|
Description
|
|
Creation Date/Time
|
It is the date and time when the snapshot was created. This is the point in time at which an index to the volume's state was marked.
|
|
Snapshot Name
|
It is the unique name given to every snapshot that is identified with a volume. Scheduled snapshots have names corresponding to the frequency at which snapshots are taken; i.e,, hourlyNN, dailyNN, weeklyNN. When an ad-hoc snapshot is created, it is receives a name in the form "snapMMMDDYYYY-HHMMSS; e.g., snapJun242013-135901 would have been taken on June 24, 2013 at 1:59:01 p.m.
|
|
Space Referenced By Snapshot
|
It is the space referenced by the snapshot
|
|
Volume
|
It is the volume to which the snapshot is referred to.
|
|
Storage Pool
|
The snapshot's storage pool
|
|
|
 Creating a Snapshot
You can create an ad-hoc snapshot of the currently selected volume. To do so, simply follow the steps given below.
1. Select the volume to which the snapshot needs to be created.
2. Navigate to the Snapshots tab.
3. Click the Create Snapshot button in the toolbar.
The Operation Success message confirming the successful creation of the snapshot will be displayed.
4. Click OK.
The new snapshot volume will be created.
|
|
 Deleting a Snapshot
You can easily delete a snapshot. Simply follow the steps given below.
1. Select the volume from which you wish to remove the snapshot.
2. Navigate to the Snapshots tab.
3. Click the Delete Snapshot button in the toolbar.
The Delete Snapshot message asking you to confirm the deletion of the snapshot will be displayed.
4. Click Yes.
The selected snapshot will be removed.
Note: Removing a snapshot removes the recovery point, along with any older disk blocks that were associated with the snapshot (it does not affect any current data blocks).
|
|
 Creating a SnapClone™ from a Snapshot
You can create a new volume as a writable clone of the snapshot. The writable clone volume is an exact replica of the volume at the time the snapshot was originally taken. The cloned volume doesn't take up any appreciable additional space; however, as changes are made to the cloned volume, new data blocks are created as difference blocks.
Simply follow the steps given below.
1. Navigate to the Snapshots tab.
2. Click Create SnapClone™ from Snapshot in the toolbar.
Note: It is best practice to recover any data you may need from the cloned volume, then delete the clone and its snapshot as soon as possible; otherwise, the snapshot and clone will continue to keep the older disk blocks locked up (allocated), occupying additional disk space over time.
The Operation Success message confirming the successful creation of the cloned, writable volume from snapshot will be displayed.
3. Click OK.
The new SnapClone™ volume from snapshot will be created and added to the list of existing volumes.
|
|