Setting Up SnapReplicate™ and SNAP HA™
Setting Up For SnapReplicate™
The following is required for a standard SoftNAS SnapReplicate™ and SNAP HA™ implementation
-
Create a virtual network with both a private and public subnet.
For more information, see section Creating a SoftNAS Virtual Machine.
-
Deploy 2 SoftNAS instances in Azure and point them to the previously created virtual network.
For more information, see section Creating a SoftNAS Virtual Machine.
-
Configure SnapReplicate™ and SNAP HA™ using SoftNAS StorageCenter™.
Configuring StorageCenter™
Once you have accessed the StorageCenter™ interface, you need to setup the Disk Devices, Storage Pools, and Volumes that will be required for HA.
For more information, see section Common Configuration Tasks for All Installations.
Note: When setting up your storage pools for replication, they have to have the same name. Otherwise, replication will not work properly. Also, you must create a volume on the source-side node.
Configuring SnapReplicate™ and SNAP HA™
To configure SnapReplicate™
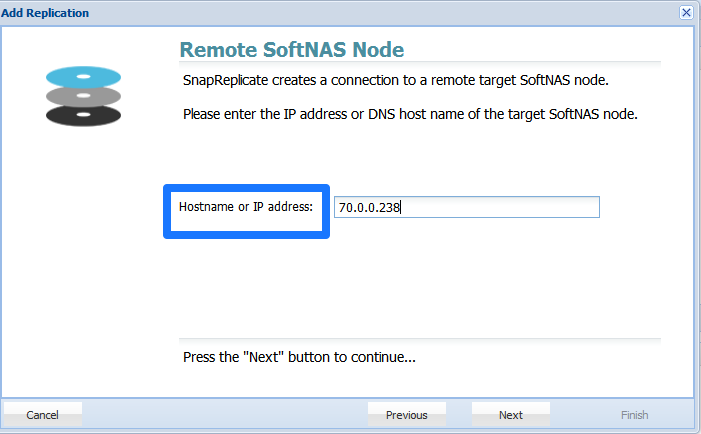
1. From Storage Center, Click on Add replication.
2. Take note of the private IP of the Azure instance that you would like to replicate to.
3. Provide this address in the screen when prompted in the Remote SoftNAS node screen.
4. Provide the Target Administrator credentials.
5. Click on Finish.
This will establish replication.
Setting Up SNAP HA™
To setup HA
1. From the SoftNAS SnapReplicate™ panel, click on Add SNAP HA.
2. Add the private IPs of both the primary and secondary Azure instances when prompted by the SnapReplicate™ interface.
3. Provide the administrator credentials if prompted.
4. Click on Finish.
At this point SoftNAS will do all of the heavy lifting that is required to establish HA, without the need for any user intervention. The process may take several minutes. After completion, you will have successfully setup a High Availability SoftNAS pair across Availability Zones in Microsoft Azure.