Powering on the Virtual Machine
Power on the VM
Once you have added the SoftNAS virtual machine, you can power it on, and obtain the required networking information.
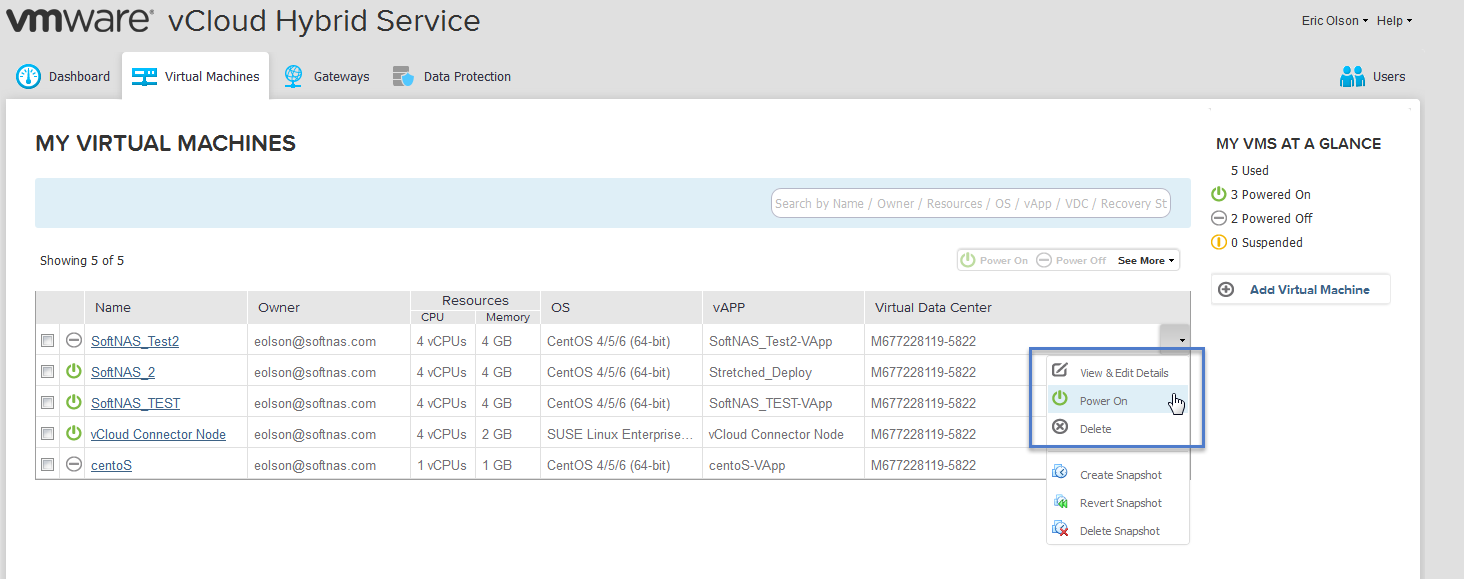
1. From the vCloud Air Dashboard, navigate to Virtual Machines, and click on the dropdwn arrow for the VM previously created. From the list of options, click on Power On.
2. Click on the name of the virtual machine.
The Virtual Machine Details are displayed.
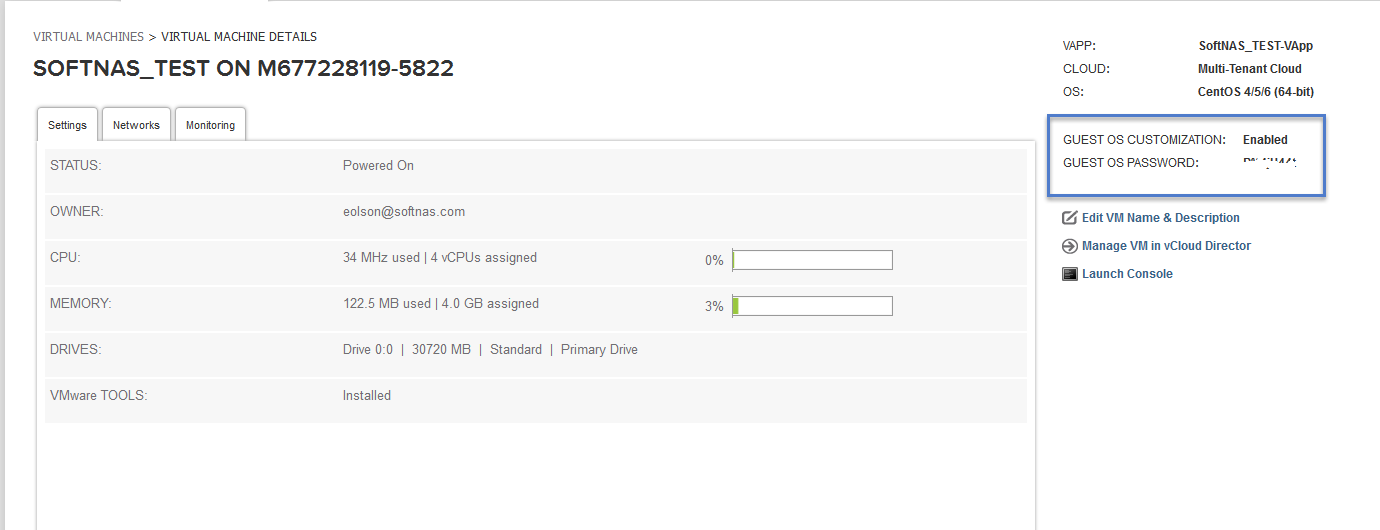
3. Take note of the "Guest OS Password," which will be used as the root password for the SoftNAS VM.
4. Click on Launch Console. Provided that the VM is booted up, you will be presented with the screen below. Take note of the public IP address. You will need this later when creating S-NAT and D-NAT rules for your SoftNAS VM.

Running the Desktop and Logging Into SoftNAS
At this point you may also want to login as root to your SoftNAS instance to perform VM administration.
To login
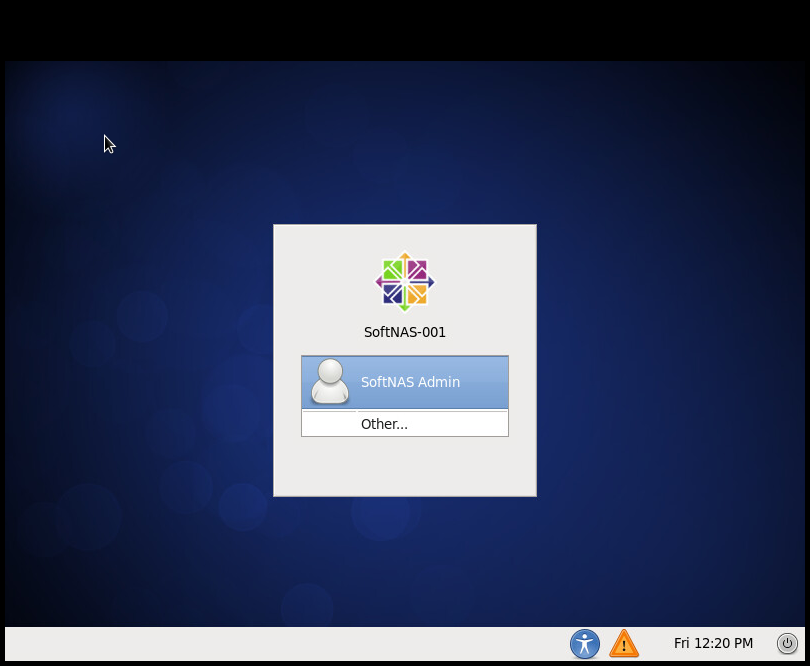
1. From the console view, click on F8: Run Desktop.
2. When prompted for the root password, enter the "Guest OS Password" that you recorded earlier.
The system will run to the Desktop and you will be presented with the SoftNAS CentOS login screen
3. Enter the following admin password: "Pass4W0rd"
The system will then load the CentOS Desktop environment.