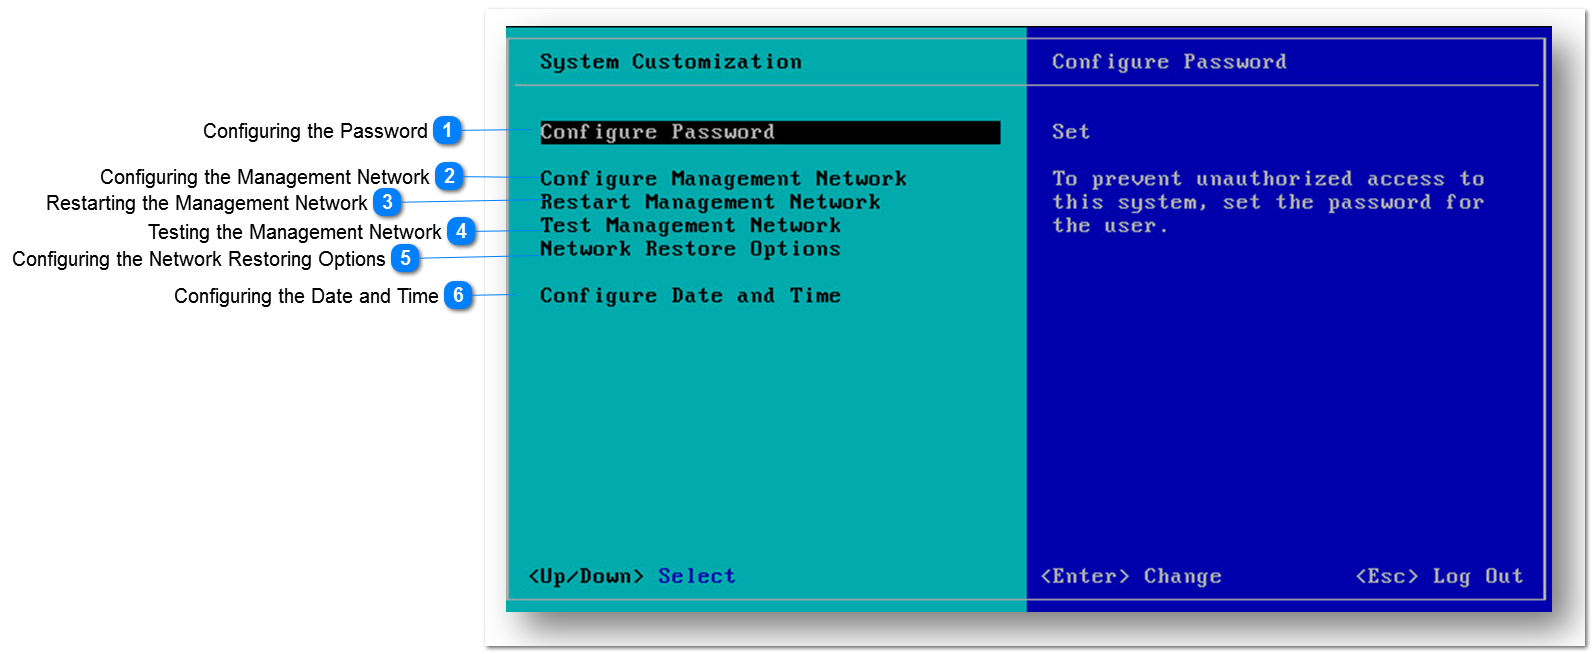
Configuring the Management Network
1. On the System Configuration Console, navigate to Configure Management Network option.
2. Press the Enter key on the keyboard.
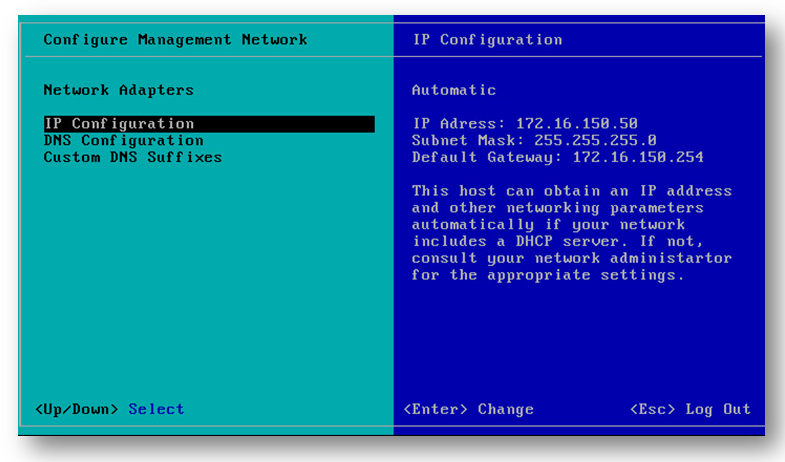
The Configure Network Management screen will be displayed.
From here, you can configure the following options.
Note: To view or modify this host’s management network settings in detail, select the required option and press the Enter key on the keyboard. You can configure the selected adapter’s IP Address and DNS settings.
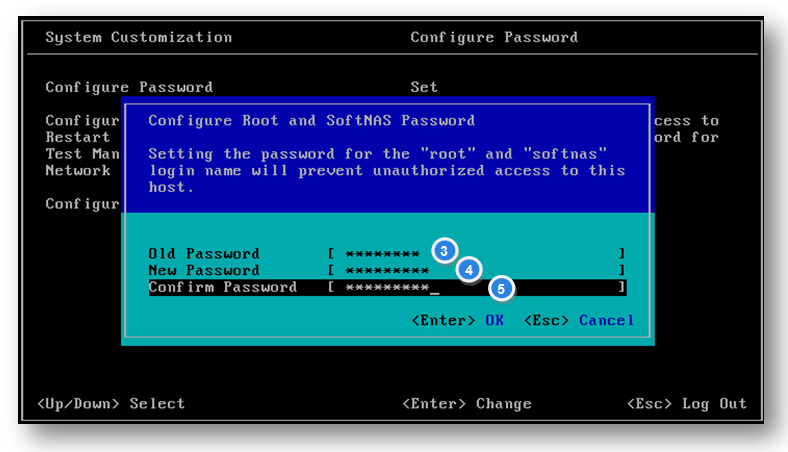
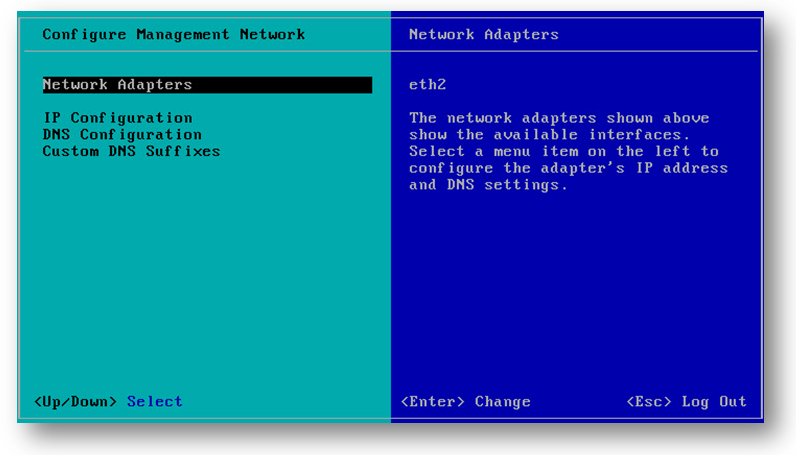
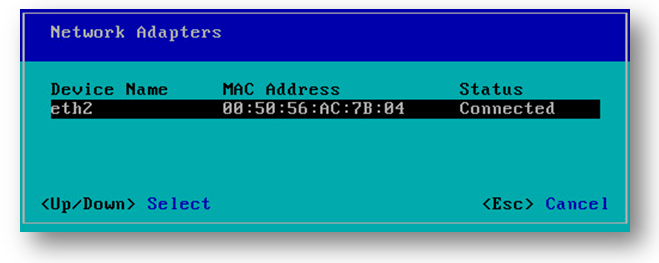
3. On the Network Adapters option, press the Enter key on the keyboard.
The network adapter screen will be displayed with the available interfaces.
4. Check the Mac Address and Status of the device.
5. Press Esc key on the keyboard.
The Configure Network Management screen will be displayed.
6. Navigate to the IP Configuration option.
7. Press the Enter key on the keyboard.
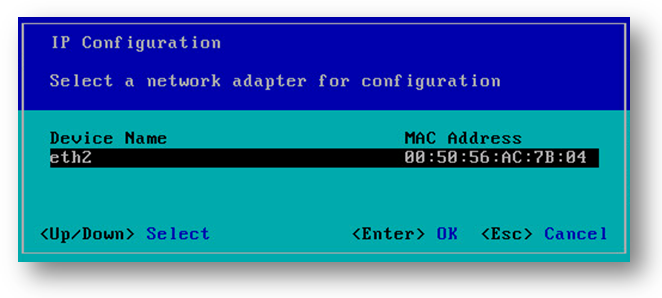
The IP Configuration dialog will be displayed.
8. Select the network adapter for configuration.
9. Press Enter key on the keyboard.
The configuration options for the selected adapter will be displayed.
This adapter can obtain network settings automatically if your network includes a DHCP server. If it does not, configure the right options.
10. Scroll down to static IP address and network configuration.
11. To select it, press the Space bar key on the keyboard.
12. Set the static IP address.
13. Configure the subnet mask address.
14. Enter the default gateway.
15. Press Enter key on the keyboard.
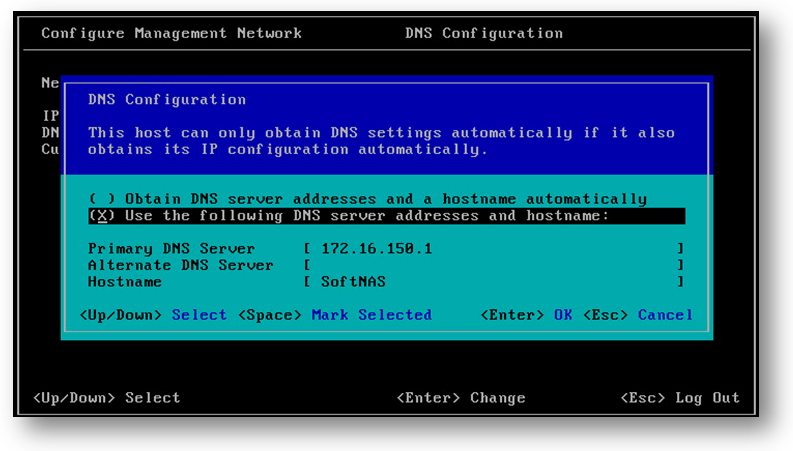
16. Back on the Configure Management Network screen, select the DNS Configuration option.
17. Press the Enter key on the keyboard.
This host can only obtain DNS settings automatically if it also obtains its IP configuration automatically.
18. Configure the required settings.
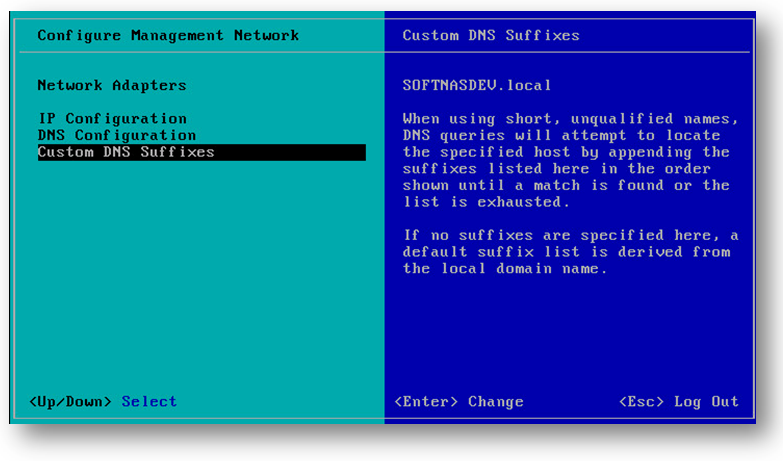
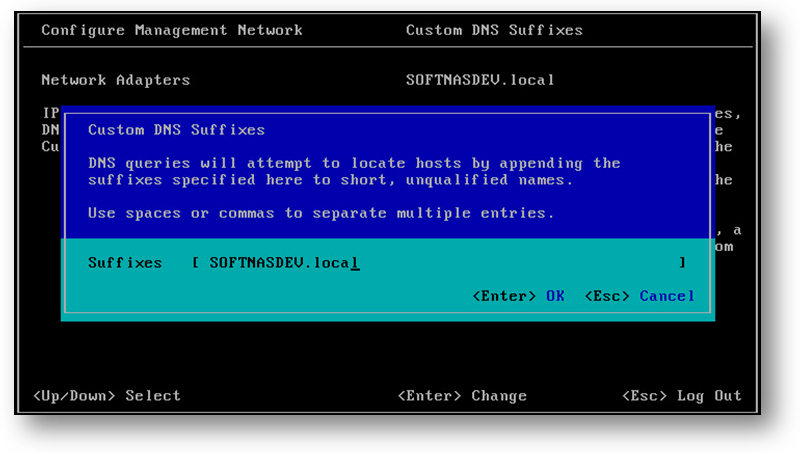
19. Back on the Configure Management Network screen, select the Custom DNS Suffixes.
20. Press the Enter key on the keyboard.
When using short, unqualified names, DNS queries will attempt to locate the specified host by appending the suffixes listed here in the order shown until a match is found or the list is exhausted.
If no suffixes are specified here, a default suffix list is derived from the local domain name.
DNS queries will attempt to locate hosts by appending the suffixes specified here to short, unqualified names.
21. Enter the proper suffix in the Suffixes field. Use spaces or commas to separate multiple entries.
22. Press the Enter key on the keyboard.
|