Creating CIFS Share
The Common Internet File System (CIFS) is the standard way that computer users share files across corporate intranets and the Internet. It provides users with seamless file and print interoperability between VMs and Windows-based clients. CIFS allows multiple clients to access and update the same file while preventing conflicts by providing file sharing and file locking.
SoftNAS uses Samba Windows File Sharing for secured, stable and fast file sharing and print services. Samba integrates Linux/Unix Servers and Desktops into Active Directory environments using the winbind daemon.
Note: Before you start creating a new file share, it is better to configure the default windows network environment settings.
Configuring Windows Networking Settings
1. Log on to SoftNAS StorageCenter.
2. In the Left Navigation Pane, select the CIFS option under the Storage section.
The CIFS Shares panel will be displayed. From here, you can configure and manage CIFS sharing.
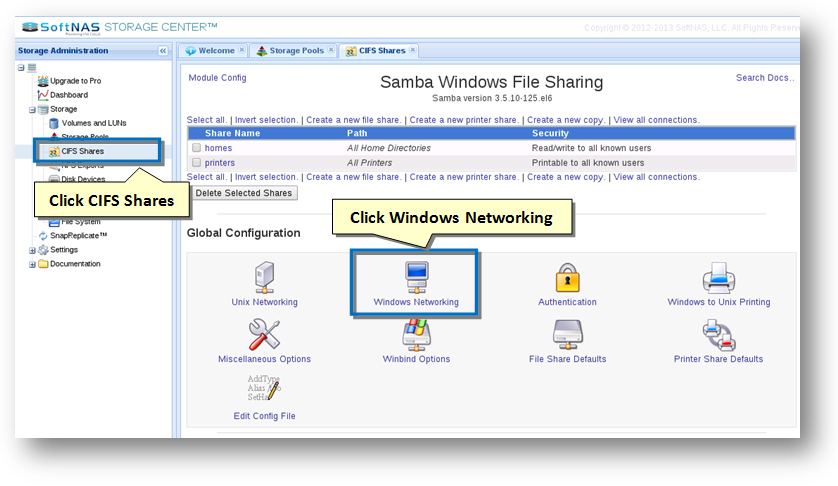
3. Click the Windows Networking icon in the Global Configuration section.
The Windows Networking Options dialog will be displayed.
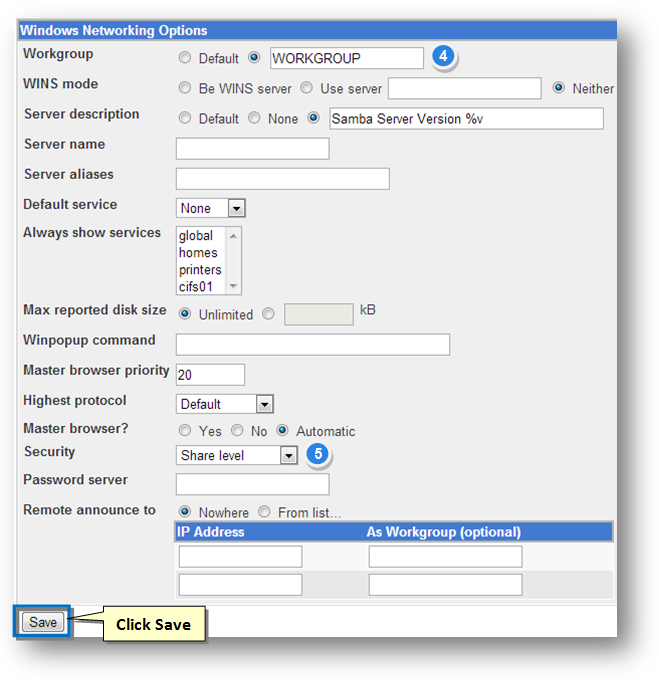
4. Set the name of the workgroup in the Workgroup field. This setting should be appropriate to your environment. It should match your Windows workgroup or domain environment.
5. Select the appropriate security option for your particular environment from the Security drop down list. The available options include Default, Share Level, User Level, Password Server, Domain and Active Directory.
Note: Configuring other settings in the Windows Networking Options dialog is optional.
6. Click the Save button.
Now your environment is ready for CIFS sharing.
Creating a New CIFS Share
1. On the CIFS Shares panel, click the Create a New File Share link.
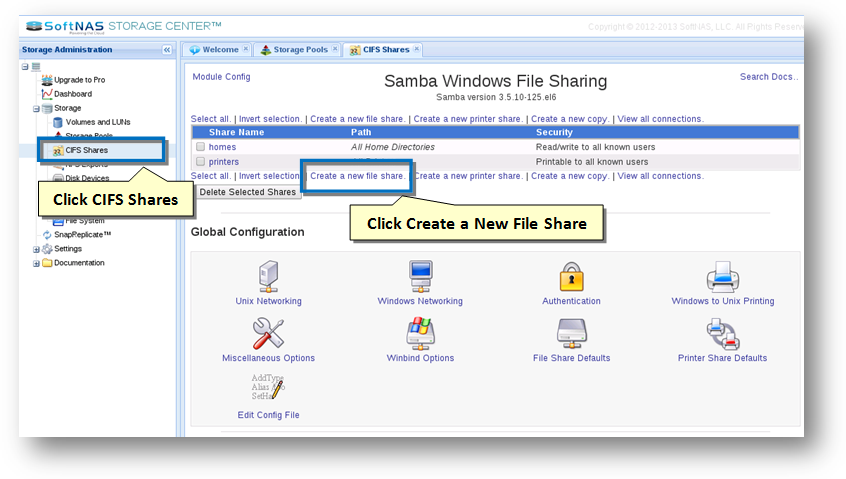
The Create File Share section of the panel will be displayed.
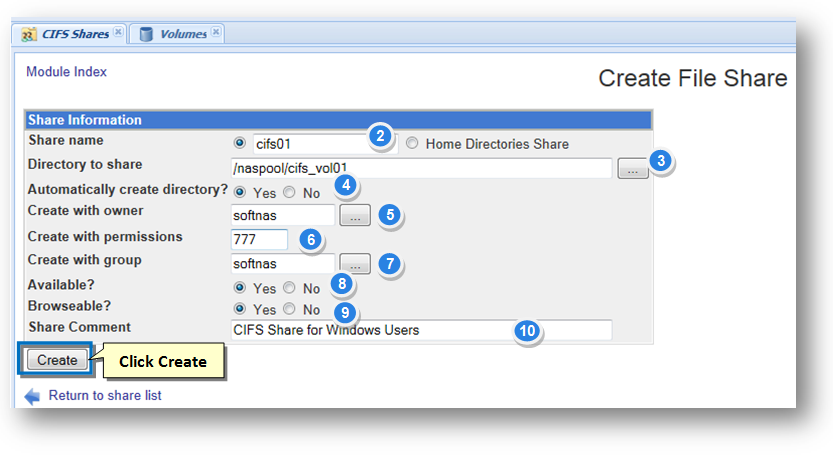
2. Enter the name of the share that will appear as the network mount point in the Share Name text entry box.
3. The Directory to share is the path to the Volume that was created in the prior step. Click the Browse button to select the Volume from the filesystem for sharing.
4. Set the Automatically Create Directory field option to be Yes.
5. The Create with Owner field determines which Linux user will be assigned to the shared folder.
6. Enter the permission mask in the Create with Permissions text entry box. Example, 777 is read/write/excute for all users.
7. The Create with Group field determines which Linux group will be assigned to the shared folder.
8. To make the share to be available on the network, check the Yes option in the Available field.
9. To make the share to be browseable on the network, check the Yes option in the Browseable field.
10. Enter the comment if any to display to users who browse the share, in the Share Comment text entry box.
11. Click the Create button.
The new file share will be created and published for access by windows servers and clients.
Managing Security and Access Control in CIFS Share
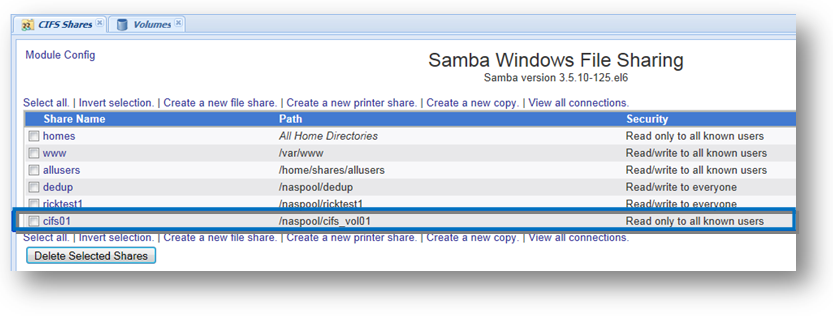
1. On the CIFS Shares panel, click the name of the CIFS share link.
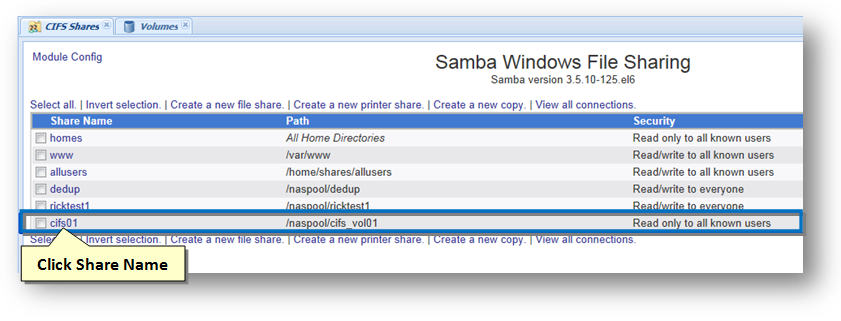
The Edit File Share dialog will be displayed.
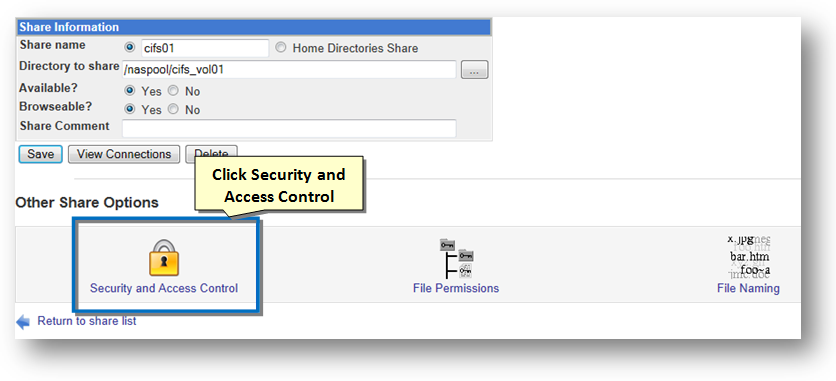
2. To configure and manage security and access control, click the Security and Access Control icon.
The Security and Access Control dialog will be displayed. Choose the settings that best match your particular needs and use case for this share.
The settings shown below allow full read/write access by all users.
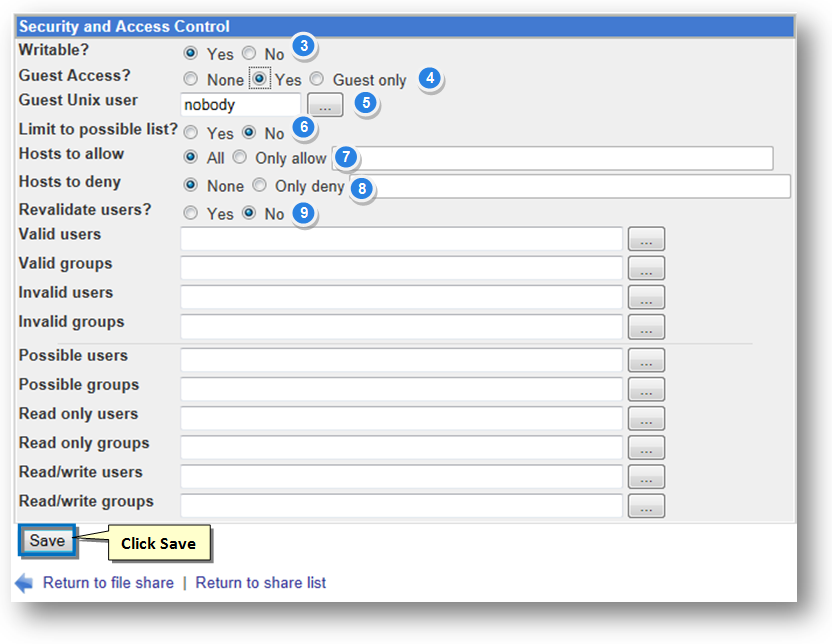
3. Set the Writable field to Yes so that writing is allowed in the files that are shared.
4. Set the Guest Access field to Yes in order to allow the guest users to access the files.
5. Set the Guest Unix User to Nobody so that other guest unix users are not allowed to access the file sharing.
7. Set the Limit to Possible List to No in order to allow unlimited sharing.
8. Set the Hosts to Allow to Yes in order to allow all hosts access file sharing.
9. Accordingly, set the Hosts to Deny to None.
10. Click the Save button.
The share security permission settings are now configured.
Verifying Access to the CIFS Share
1. To verify access the CIFS share, navigate to Windows system ->Windows Explorer.
2. Enter the UNC path of the SoftNAS server (or the DNS hostname if you have assigned one to SoftNAS).
3. Click on the Share icon and verify access permissions are set correctly from the Windows perspective.
4. Create a folder or text file and then right-click on the file/folder to verify that the Security permissions are as expected.
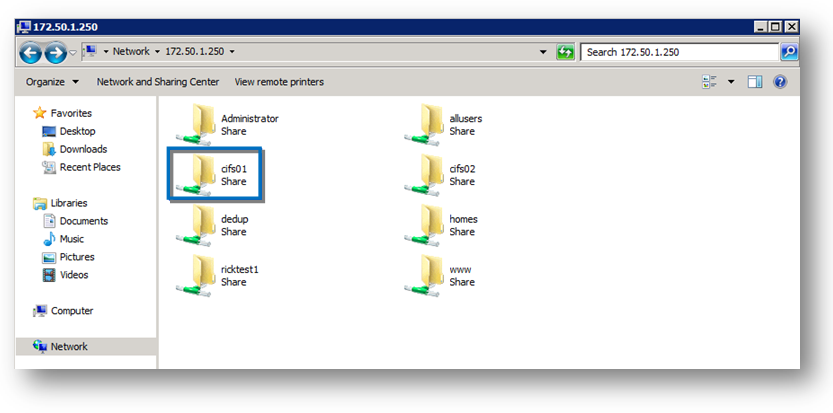
The CIFS share that was created is now available and ready for use.
Note: You can also use File Share Defaults to set defaults for all shares so that there is no need to configure settings for each share.