Creating CIFS Share
The Common Internet File System (CIFS) is the standard way that computer users share files across corporate intranets and the Internet. It provides users with seamless file and print interoperability between VMs and Windows-based clients. CIFS allows multiple clients to access and update the same file while preventing conflicts by providing file sharing and file locking.
SoftNAS uses Samba Windows File Sharing for secured, stable and fast file sharing and print services. Samba integrates Linux/Unix Servers and Desktops into Active Directory environments using the winbind daemon.
Note: Before you start creating a new file share, it is better to configure the default windows network environment settings.
Creating a New CIFS Share
You can create a new CIFS share, by creating a new Volume, and selecting to share via CIFS.
To create a new CIFS share volume
1. From the SoftNAS Storage Center UI, navigate to Volumes and LUNs
2. Click on Create.
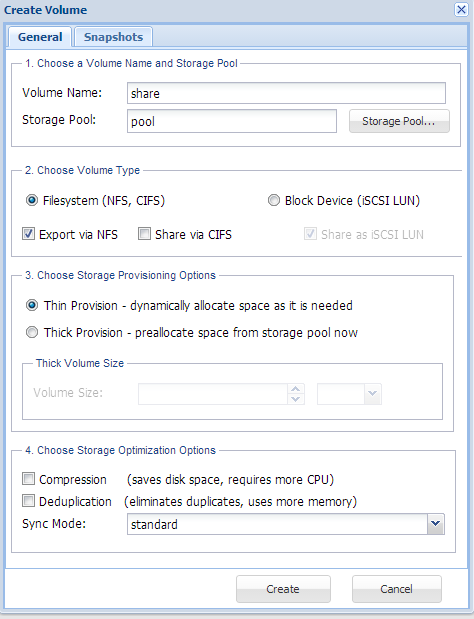
3. Provide a Volume Name and Storage Pool
4. For "Choose Volume Type" select Share via CIFS
5. Fill in the remaining settings as per the requirements of your environment. See the document "SoftNAS Installation Guide" for more information.
6. Click on Create.
Viewing the CIFS share
Once you have created the new volume and shared via CIFS, a new CIFS Share is populated.
To verify the CIFS Share
1. From SoftNAS Storage Center navigate to CIFS Shares.
2. The new CIF share(s) are available at the listed path.

Verifying Access to the CIFS Share
Once you have created the CIFS Share you can validate its use, by connecting to it from a Windows environment.
In this case we will connect to the SoftNAS CIFS Share from a Windows virtual machine, running in vCloud Air.
1. From the Windows virtual machine, open Windows Explorer.
2. Enter the private LAN IP of the SoftNAS machine that contains the CIFS share.
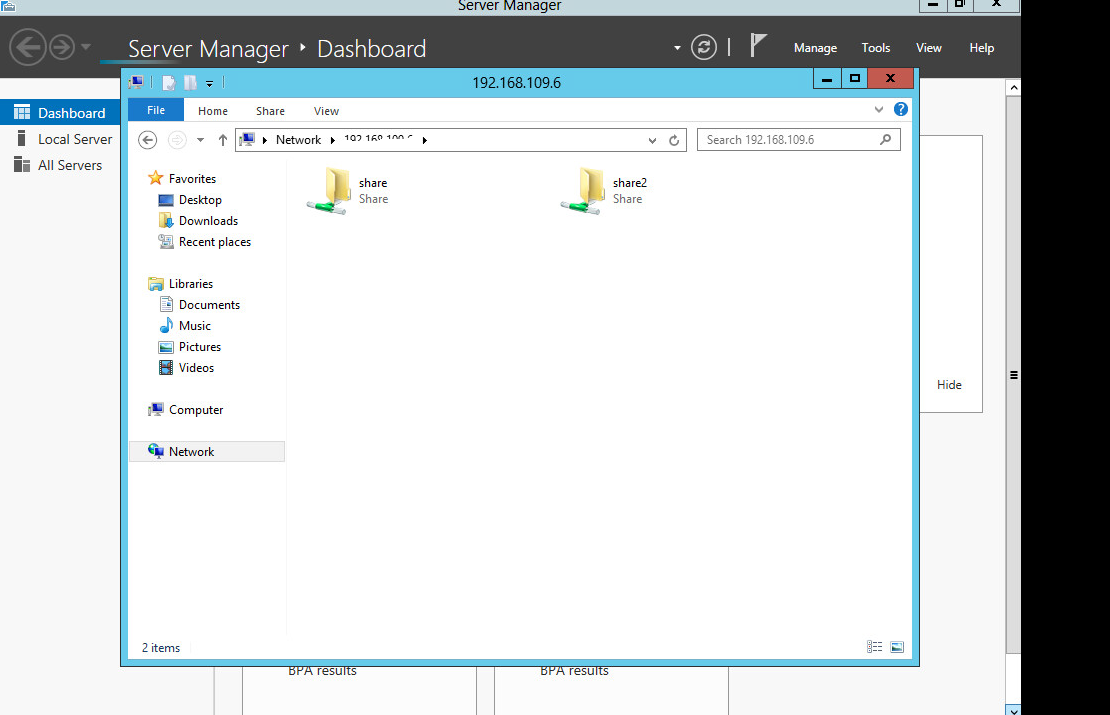
The CIFS share that was created is now available and ready for use.