Accessing SoftNAS Storage Center Instance from Browser
Accessing the SoftNAS Storage Center instance from of EC2 on your browser is very easy. Simply follow the steps given below.
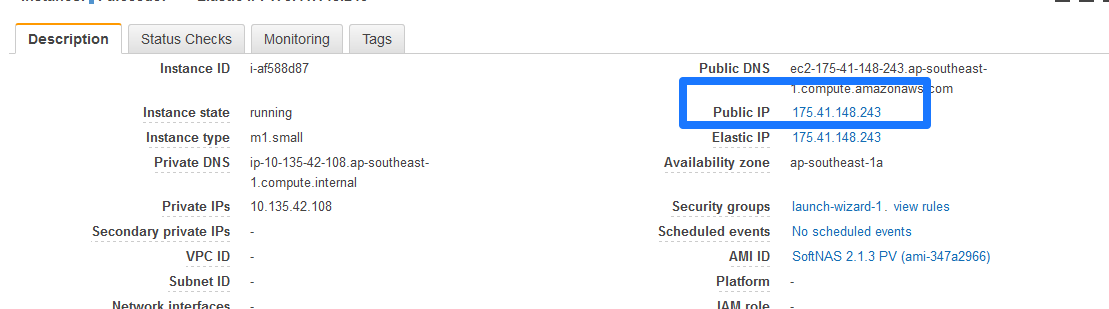
Before accessing the SoftNAS Storage Center Instance from your browser, first copy the instance URL or the associated elastic IP address of the instance from EC2 dashboard.
1. On the Instances page in the EC2 Dashboard, select the instance that you wish to run.
2. Under Description, copy the public IP of the instance that you want to connect to.
2. Now open your browser and paste the copied URL or IP address in the address bar of the browser.
The web browser may warn you that the web address is not secure. Simply accept this warning and proceed with the site.
The Authentication Required dialog will be displayed.
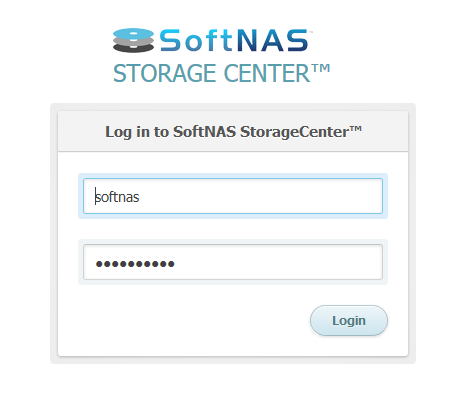
3. Enter the user name as softnas in the User Name text entry box.
4. Enter the SoftNAS instance ID as the default password in the Password text entry box. The "softnas" account default password is automatically set to the "instance ID" upon initial boot of the appliance for the first time. For example, if your SoftNAS instance ID is "i-202efd38", then use this as the password.
5. Click the OK button.
The initial License Agreement page will be displayed.
6. Read the SoftNAS license agreement and click I Agree button to accept the same.
The Welcome and Release Notes of SoftNAS Storage Center will be displayed.
From here, you can access all the features and functions of SoftNAS Storage Center.
Note: Be sure to set the correct date/time and time zone for your SoftNAS server to ensure proper operation (filesystem sharing and license management require correct date/time on both the SoftNAS server and the administrator client computers). It's often best to use NTP to automatically synchronize clients and servers to the same authoritative time source; e.g., Windows domain controllers.