Amazon AWS Installation Overview
This section describes how to setup an Amazon AWS Virtual Private Cloud (VPC) in high availability (HA) mode to work with SoftNAS SNAP HA™.
The following is required
-
-
Configure the routing tables.
-
Launch an Instance of SoftNAS into the VPC.
-
Create and Associate the Required Elastic IPs.
-
Creating the VPC
A VPC is a private, isolated section of the AWS cloud that can be setup in a variety of configurations.
For SoftNAS SNAP HA™ it is recommended to create a VPC with both Public and Private subnets. Instances in the private subnet can establish outbound connections to the Internet via the public subnet using Network Address Translation.
To create the VPC
-
From the VPC Dashboard, click on
Start VPC Wizard.
-
Select
VPC with Public and Private Subnets as the configuration scenario.
-
Click on
Continue. The
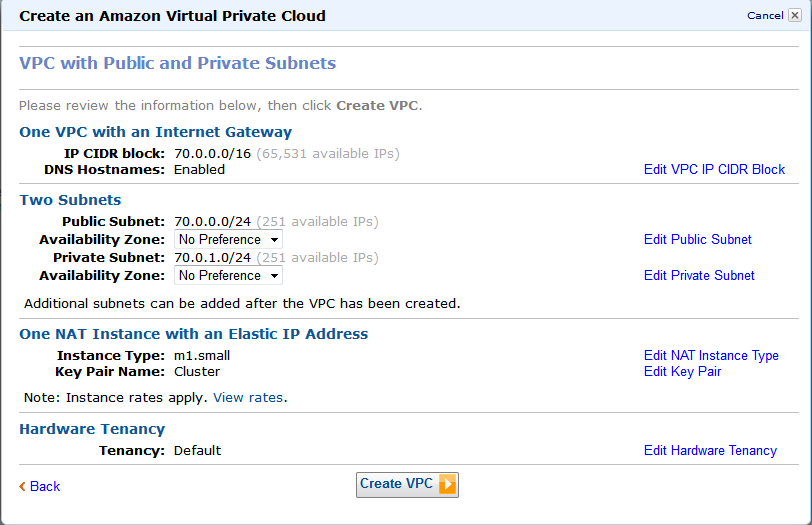
Create an Amazon Virtual Private Cloud screen is displayed.
4. Configure the IP CIDR block, Public and Private subnets, and NAT settings as appropriate. For the purposes of example, the 70.0.0.0 VPC will be used in these configuration procedures.
5. Click on Create VPC. AWS will create the VPC with the Public and Private subnets.
Setting Up the Routing Tables
In the routing tables configuration, you will ensure that both the private and public subnets are associated to the main routing table of the VPC. You will also ensure that the default route uses the IP gateway. This will enable accessibility to your VPC using an elastic IP address.
To setup the routing tables
-
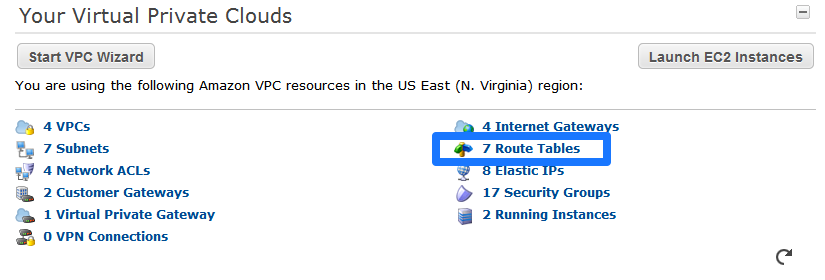
From the VPC Dashboard, click on the
Route Tables icon.
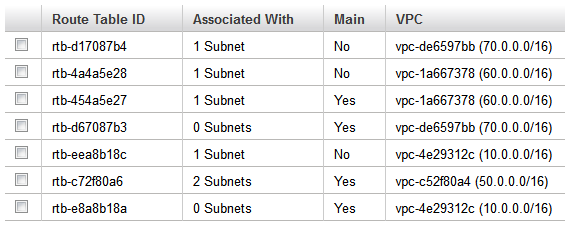
2. The available routing tables are displayed. In the screenshot below, the main routing table for the 70.0.0.0 VPC has no associated subnets. We want to ensure that both the public and private subnets are associated to the main routing table.
3. Click on the main routing table to select it. The route table settings will appear at the bottom of your screen.
4. Click on Associations, and ensure that both the private and public subnets are associated to the main routing table. You can click the down arrow to select the subnet for association.
5. Click on Associate, once the subnet has been selected.
Default Routes:
When you create a VPC, the default route for the main routing table is the NAT instance. However, depending on your networking environment, you may want to redirect this route to an internet gateway.
Note: The following procedure is optional. Use of the NAT gateway may be appropriate depending on your networking setup.
To change the default route
1. From the main route table settings, click on Routes. The default route to the NAT device is displayed.
2. Click on Remove next to the default route.
3. Click on Yes when prompted by the Delete Route screen.
4. Recreate the default route (0.0.0.0/0) and point it to the internet gateway, by selecting it from the Target dropdown.
Launch An Instance of SoftNAS into the VPC
To launch an instance of SoftNAS into the already setup VPC, the following is required:
-
Select the appropriate SoftNAS AMI from the Community AMI section of EC2 services.
-
Select at least the small instance
-
Configure the instance details
-
launch instance into the subnet
-
add an additional ethernet interface
-
-
-
-
select a key pair for SSH
-
The above procedure is repeated to create a second SoftNAS instance for HA.
Selecting the SoftNAS AMI
The SoftNAS AMI is selected from the Community AMI section of EC2 services.
To select SoftNAS AMI
1. From EC2 services, click on Launch Instance>Community AMIs>Search for SoftNAS.
2. Select a SoftNAS image that includes SoftNAS SNAP HA™ (must select at least version 2.1).
Choosing an Instance Type
SoftNAS requires at least the use of a small instance type.
To select the small instance
1. From Step 2. Choose an Instance Type, click on General purpose.
2. Select at least a small instance.
3. Click on Next:Configure Instance Details.
Instance Details
To configure the instance details
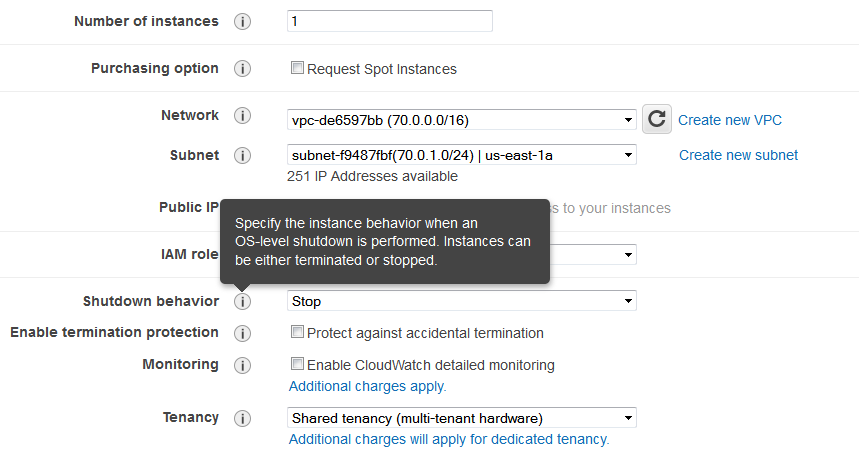
1. For Network, select the previously configured VPC.
2. Select one of the available public or private subnets to associate with this instance.
3. Click on Add Device, to add a second ethernet interface.
4. Click on Next: Add Storage.
Adding Storage and Tagging
To add storage
1. From the storage screen, add storage volumes as necessary. Ensure that Delete on Termination is selected.
2. Tag the Instance as required, using descriptive terms.
Security Groups
Security groups for SoftNAS must include TCP port 80, 443, and 22 and ICMP Echo Reply and Echo Response. Source can be locked down as per your security requirements.
To create the required rules for the security group
1. From Configure Security Group, click on Add Rule.
2. Select "Custom TCP Rule" and select port 80. Source can be set to "Anywhere, My IP or Custom IP," based on your security requirements.
Repeat the above procedure to add the Custom TCP Rule for port 443, 80 and 22.
Enable ICMP Echo Reply and Request. You must enable ICMP echo reply and request for "ping" requests to work, or the HA system will not function correctly.
Note: It is recommend to restrict the Source IP address to a range of valid address, not "Anywhere" as shown in this example, for best security.
3. Click on Review and Launch.
4. Provide the appropriate key pair when prompted.
Associating the Required Elastic IPs to the SoftNAS Instances
SoftNAS SNAP HA™ requires the use of three elastic IPs. One IP is associated to each VPC instance, and a third IP is associated to the VIP interface.
Creating the Elastic IPs
You will need to create three elastic IPs for use with SoftNAS.
To create the IPs
1. From the EC2 Services Dashboard, click on Elastic IPs.
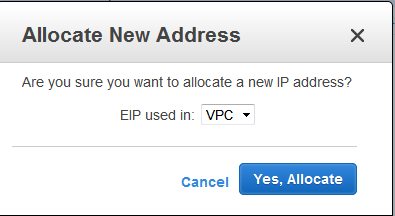
2. Click on Allocate New Address.
3. For EIP used in, select "VPC."
Repeat the procedure to create three new elastic IPs for the VPC.
Associating the Elastic IPs to the SoftNAS Instances.
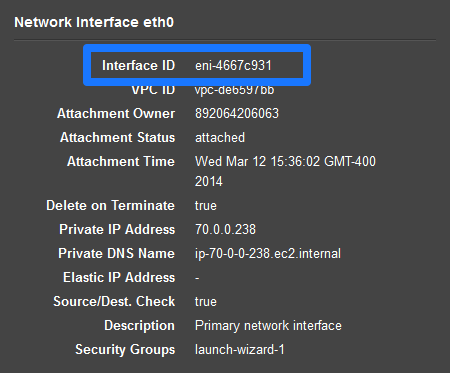
To associate the Elastic IPs to the instances, you need to take note of the Interface ID of your SoftNAS instance. This can then be used to associate an Elastic IP.
To associate the IP
1. From the EC2 Services Dashboard, click on Instances.
2. Select one of the SoftNAS instances.
3. Scroll down to the Network interfaces settings.
4. Click on "eth0" and take note of the Interface ID.
5. Click on Elastic IPs.
6. Select the Elastic IP of choice.
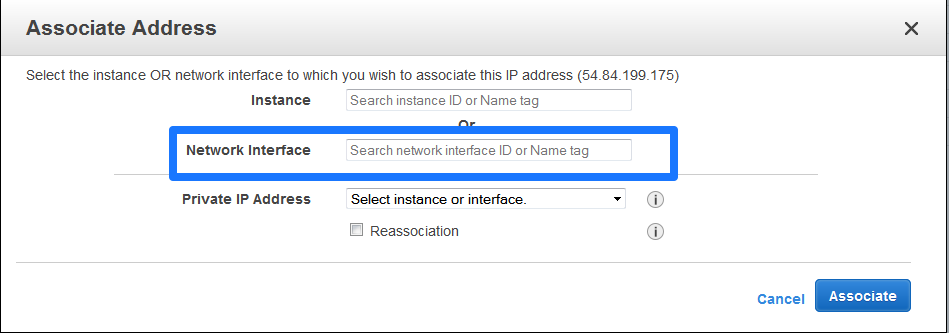
7. Click on Associate Address.
8. From the Associate Address window, select the corresponding Network Interface from the dropdown.
9. Click on Associate.
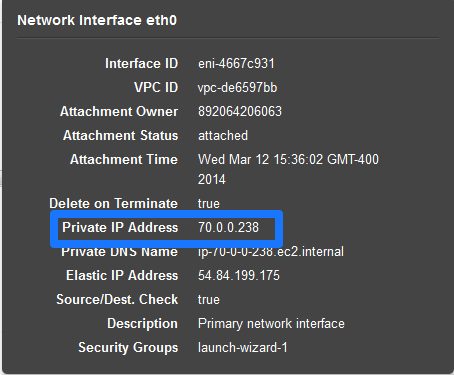
The Elastic IP is associated with the SoftNAS instance.
You must repeat the above procedure to associate another Elastic IP to the other SoftNAS instance.
Setting Up for SNAP HA™
To setup SoftNAS for SNAP HA™, you need to log into the SoftNAS instances and access SoftNAS via the SoftNAS Storage Center interface. Via the Storage Center interface you can setup SoftNAS with the required Disc Devices, Storage Pools, and Volumes. Once this is complete for both SoftNAS instances, you can setup replication and SoftNAS HA™.
Logging Into SoftNAS
To login to SoftNAS you will require the public IP of the SoftNAS instance, as well as the Instance ID (default password).
To login to SoftNAS
1. Obtain the public IP of the SoftNAS instance, as listed on the Instances screen.
2. Select the SoftNAS instance.
3. Copy the Instance ID.
4. Navigate your web browser to the Public IP of the instance.
5. When prompted, use "softnas" as the username and the Intance ID (eg. "i-99abc991") as the password. You can change the password later, as required.
The SoftNAS Storage Center interface will load.
Setting Up SoftNAS
Once you have accessed the Storage Center interface, you need to setup the Disc Devices, Storage Pools, and Volumes that will be required for HA.
For more information, see the document "SoftNAS Installation Guide."
Note: When setting up your storage pools for replication, they have to have the same name. Otherwise, replication will not work properly. Also, you must create a Volume on the source side node.
Setting Up Replication and HA
Note: You must be running a version of SoftNAS professional to use SNAP HA™, and use of SNAP HA™ requires a separate HA license.
Setting up Replication:
To setup replication
1. Click on Add replication.
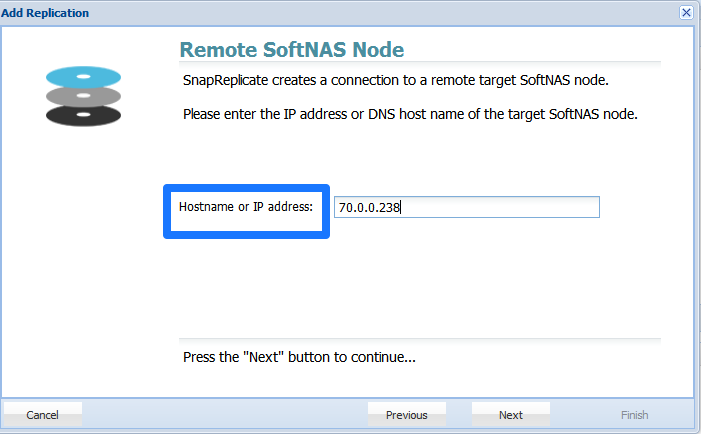
2. Take note of the private IP on ethernet 0 of the secondary node, which you would like to replicate to.
3. Provide this address in the screen when prompted in the Remote SoftNAS node screen.
4. Provide the SoftNAS instance credentials.
5. Click on Finish.
This will establish replication.
Setting Up HA:
You must apply the HA license before you can setup HA.
To apply the HA license
1. From the SoftNAS SnapReplicate™ HA panel, click on Add SNAP HA.
2. Apply your HA license key in the HA License key screen that is displayed.
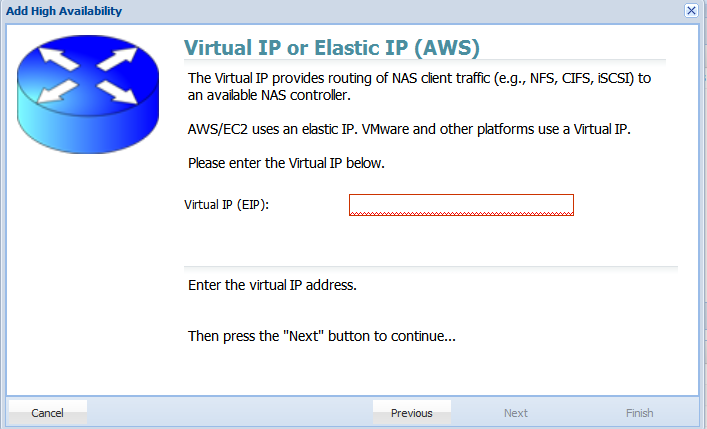
3. Add the Elastic IP which was previously configured in AWS. This is the Elastic IP that we previously created, but did not assign to a VPC.
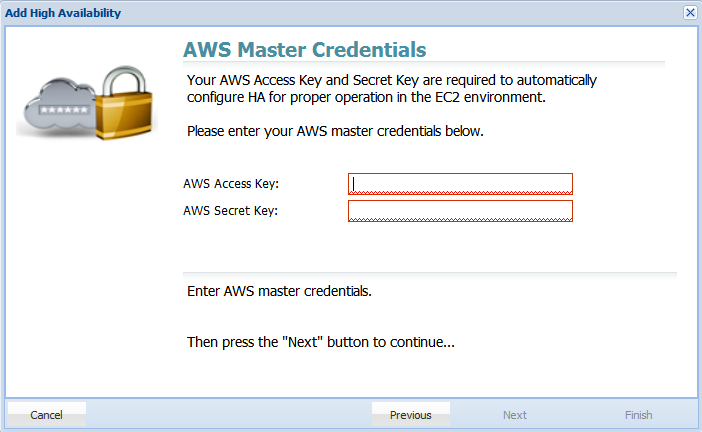
4. Provide your AWS access key and secret key.
5. Click on Finish.
At this point SoftNAS will do all of the heavy lifting that is required to establish HA, without the need for any user intervention. The process may take several minutes. After completion, you will have successfully setup a high availability SoftNAS pair across availability zones in AWS.
